- Administrator: Configure the document sharing via link feature for the entire workspace.
- Approver: Review sharing requests and manage document access permissions.
Feature Setup (Administrator)
This operation only needs to be performed once before deploying to employees.Step 1: Block unmanaged file transfers
To ensure data is only shared via the system link, Administrators need to enable the file transfer blocking feature. Go to: Device Management → Data Protection → File Transfer Blocking → Toggle onBlock file transfer.

Step 2: Configure Sharing Management Mode
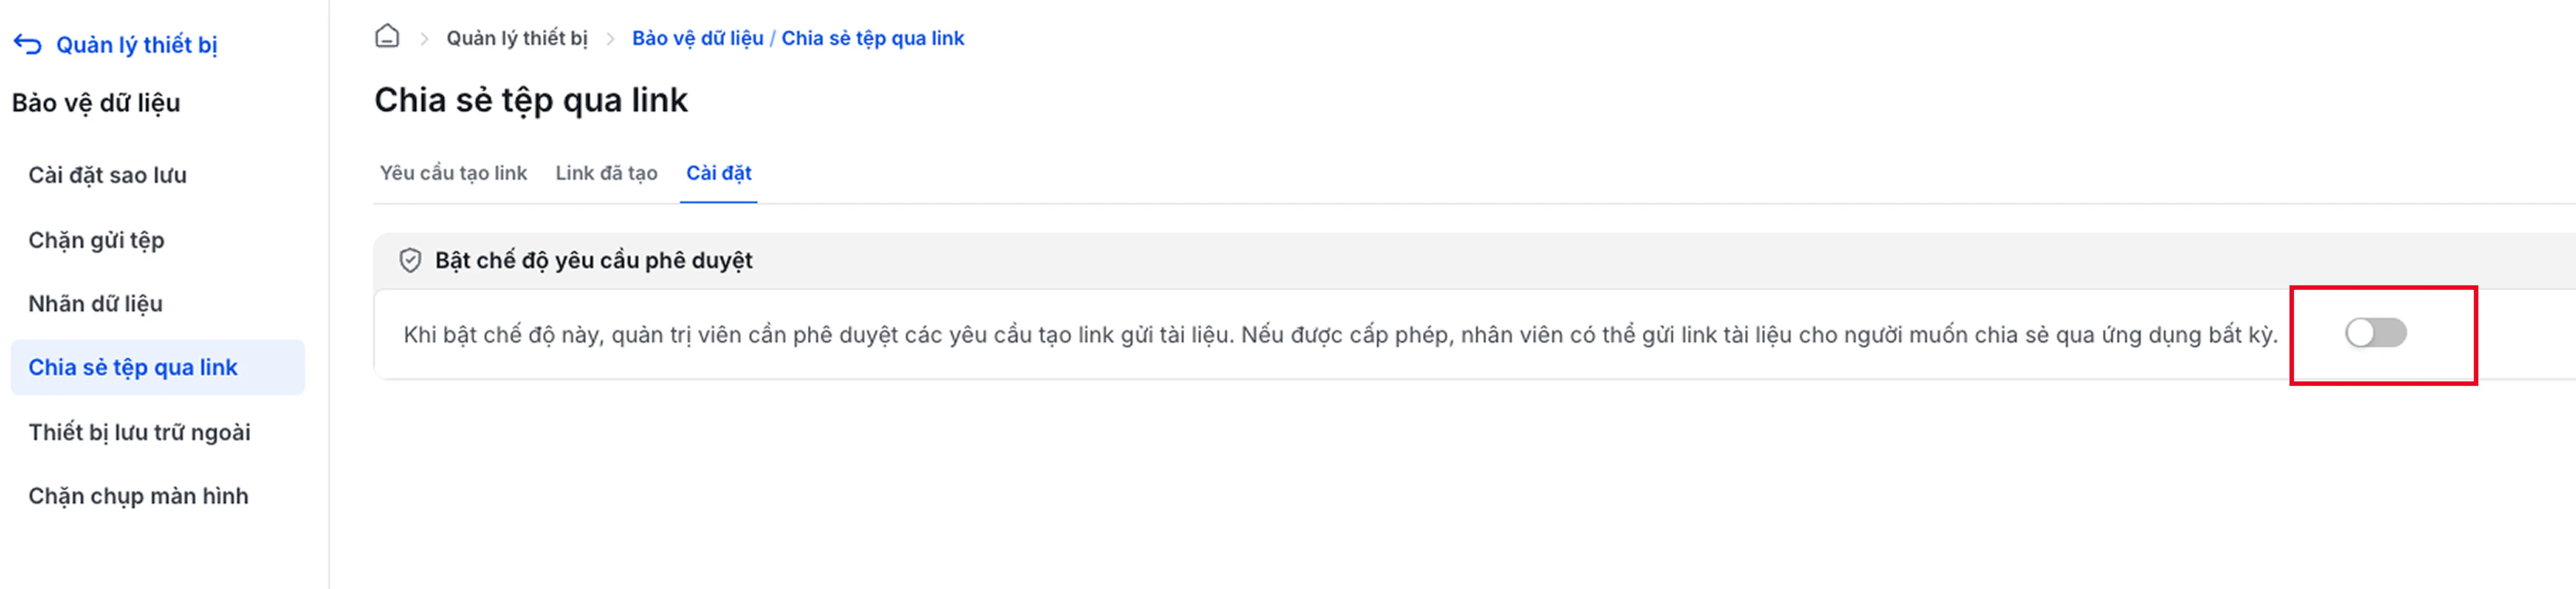
Administrators choose one of two control mechanisms:- Free Mode: Employees actively create links. Administrators perform post-audit via Logs (tracking identity, time, and number of visits).
- Approval Mode: Links only become effective after the employee’s request is approved by an Approver.
Go to Device Management → Data Protection → File Sharing via Link → Settings.
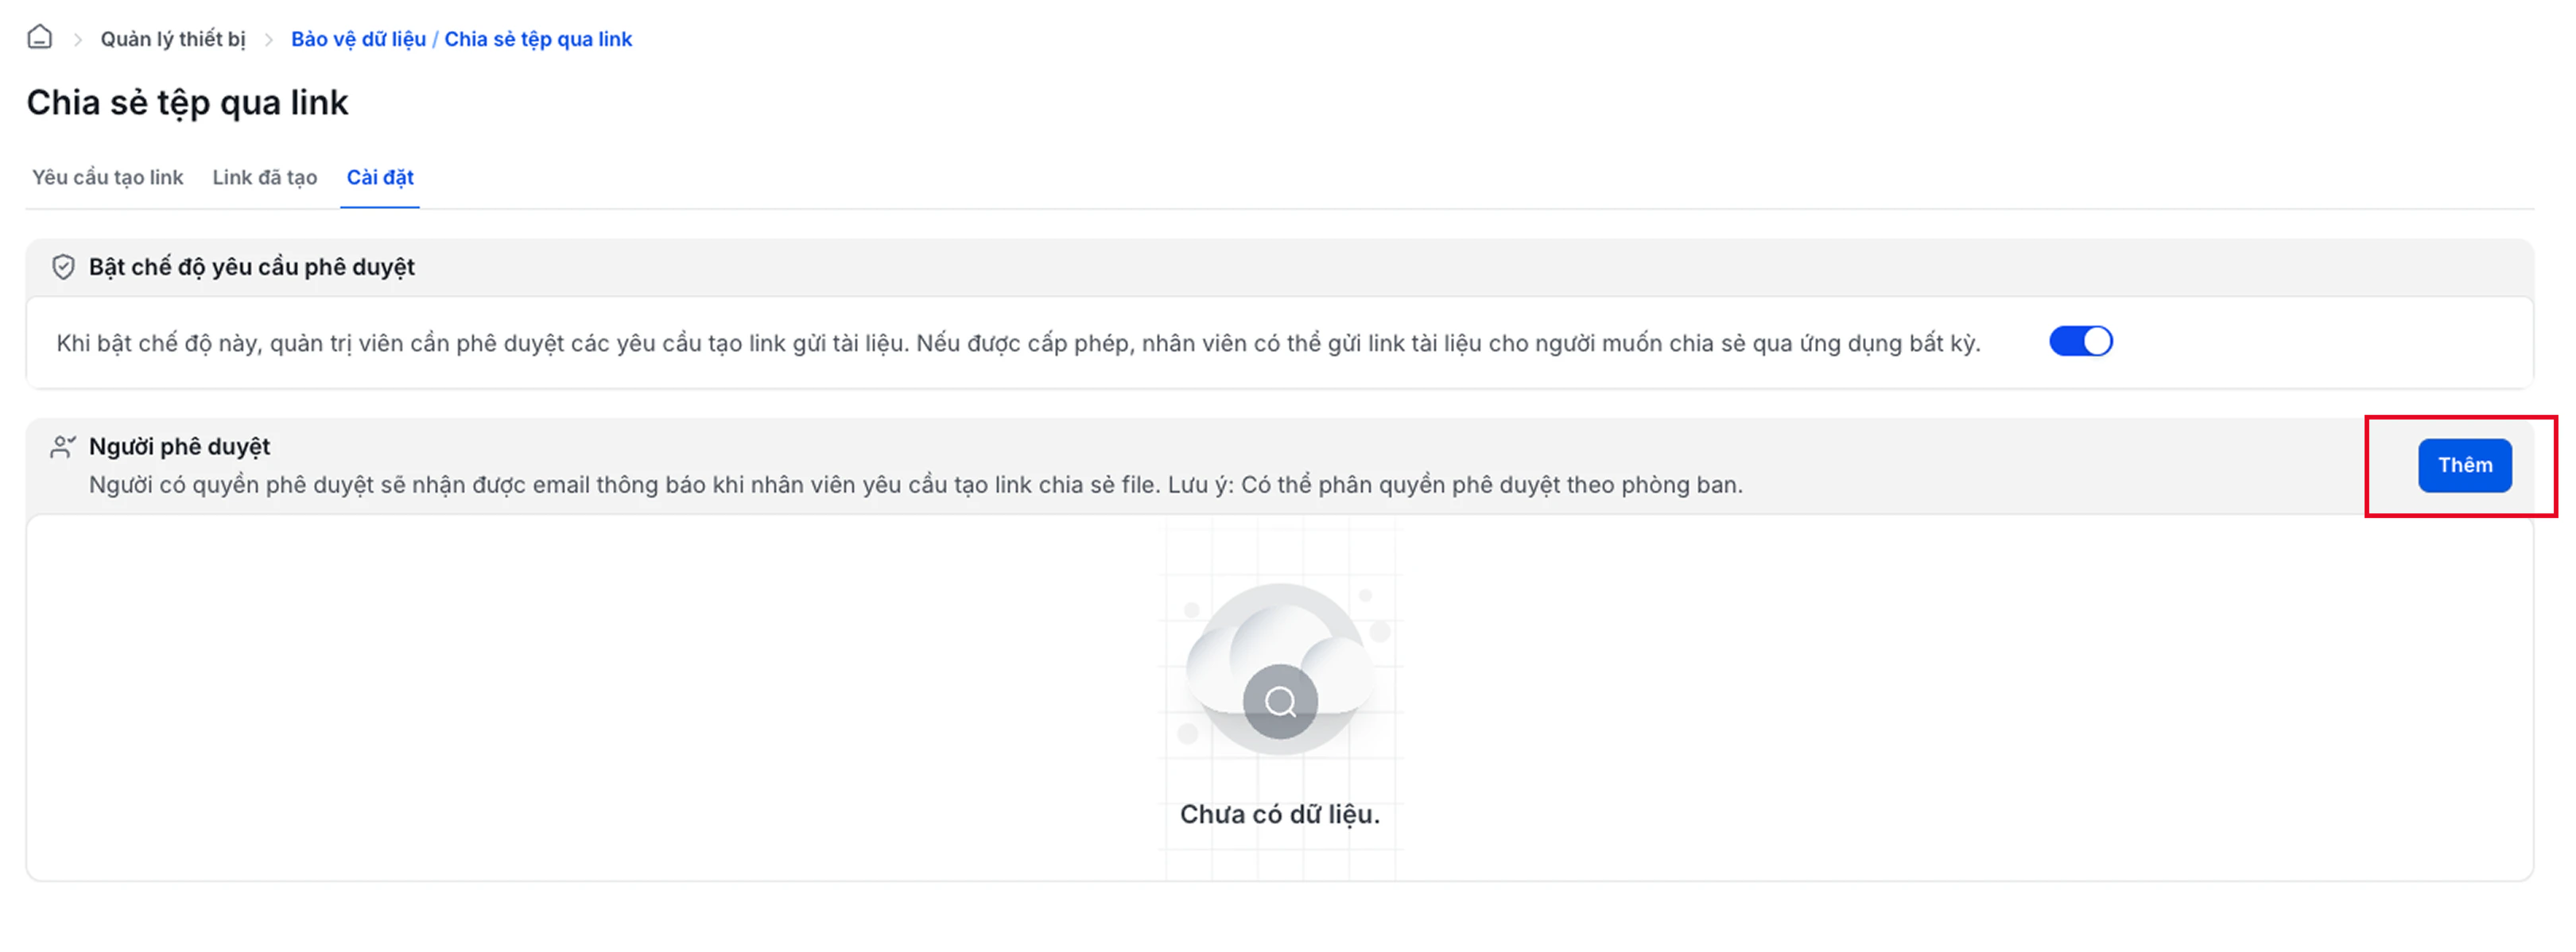
Toggle on Approval Mode.
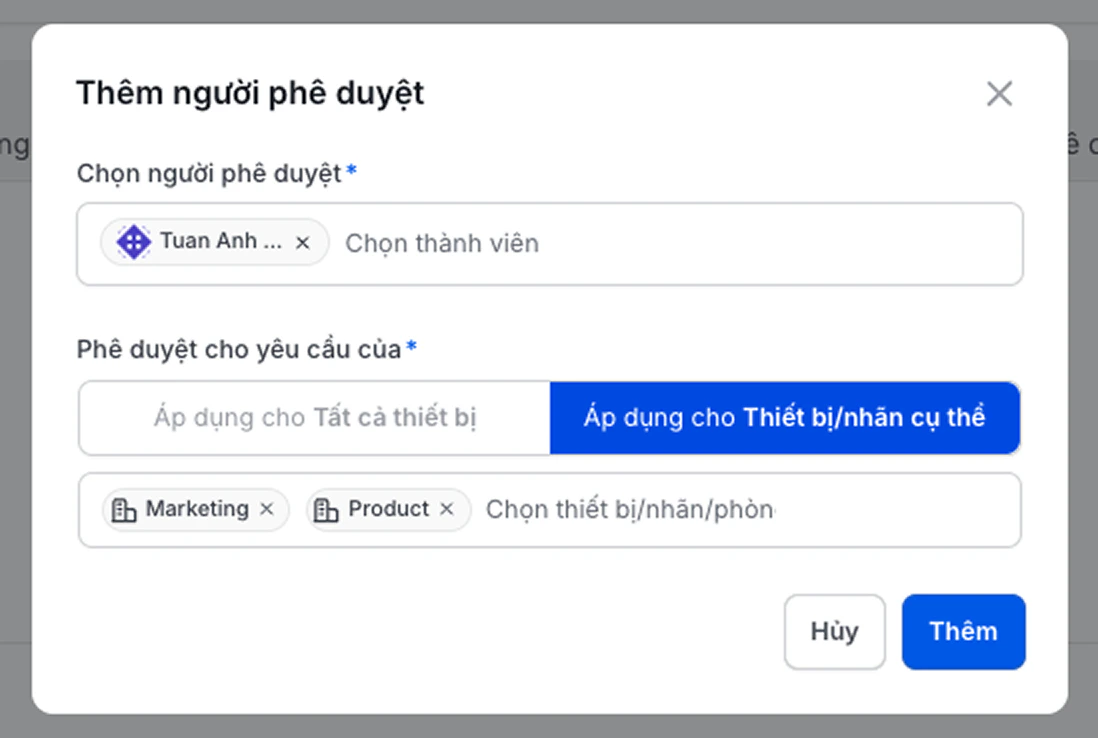
Click Add to designate Approvers to the list.
Select members from the Workspace, assign permissions by device or department, then click Add.
Request Review (Approver)
Applicable when the Administrator has enabled Approval Mode.
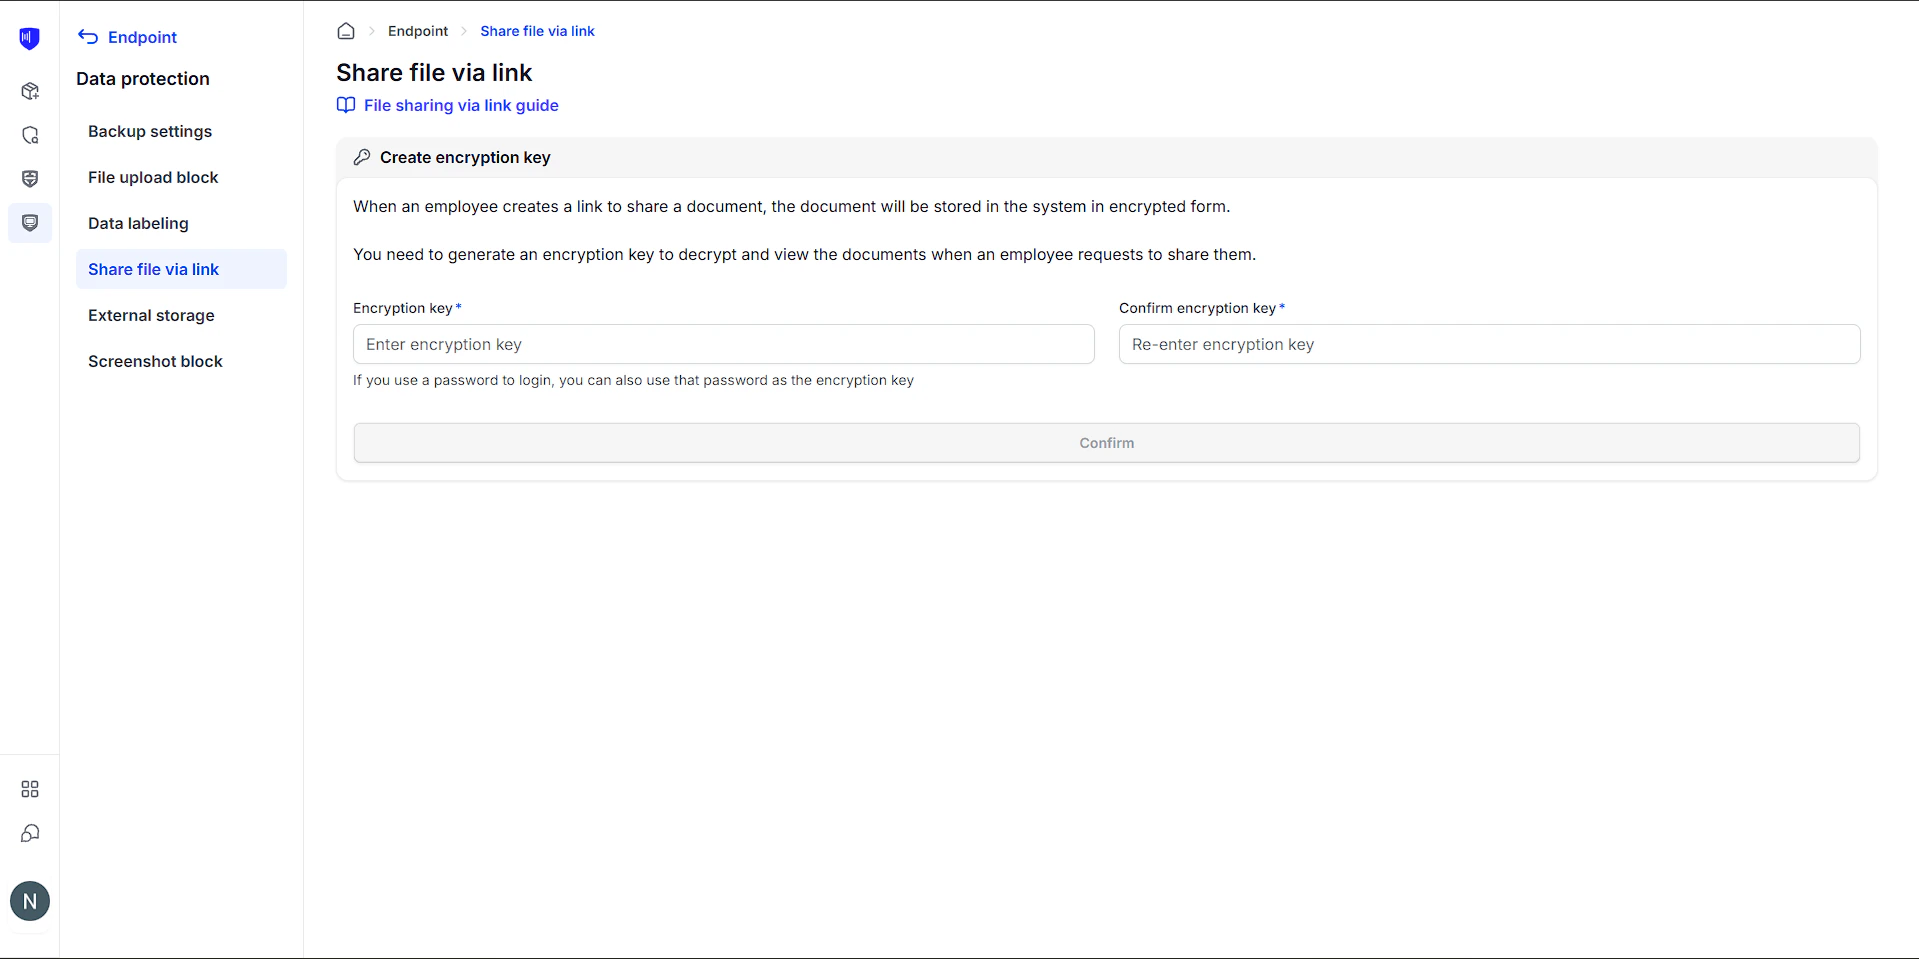
Step 1: Create a Security Key (first-time setup)
The Security Key is a unique password for each account, used to decrypt document content when Previewing or downloading files directly from the system. Only the key owner can view the content - no other account in the same workspace can view it on their behalf.Enter your desired Security Key.
Re-enter to confirm the key.
Click Confirm to complete.
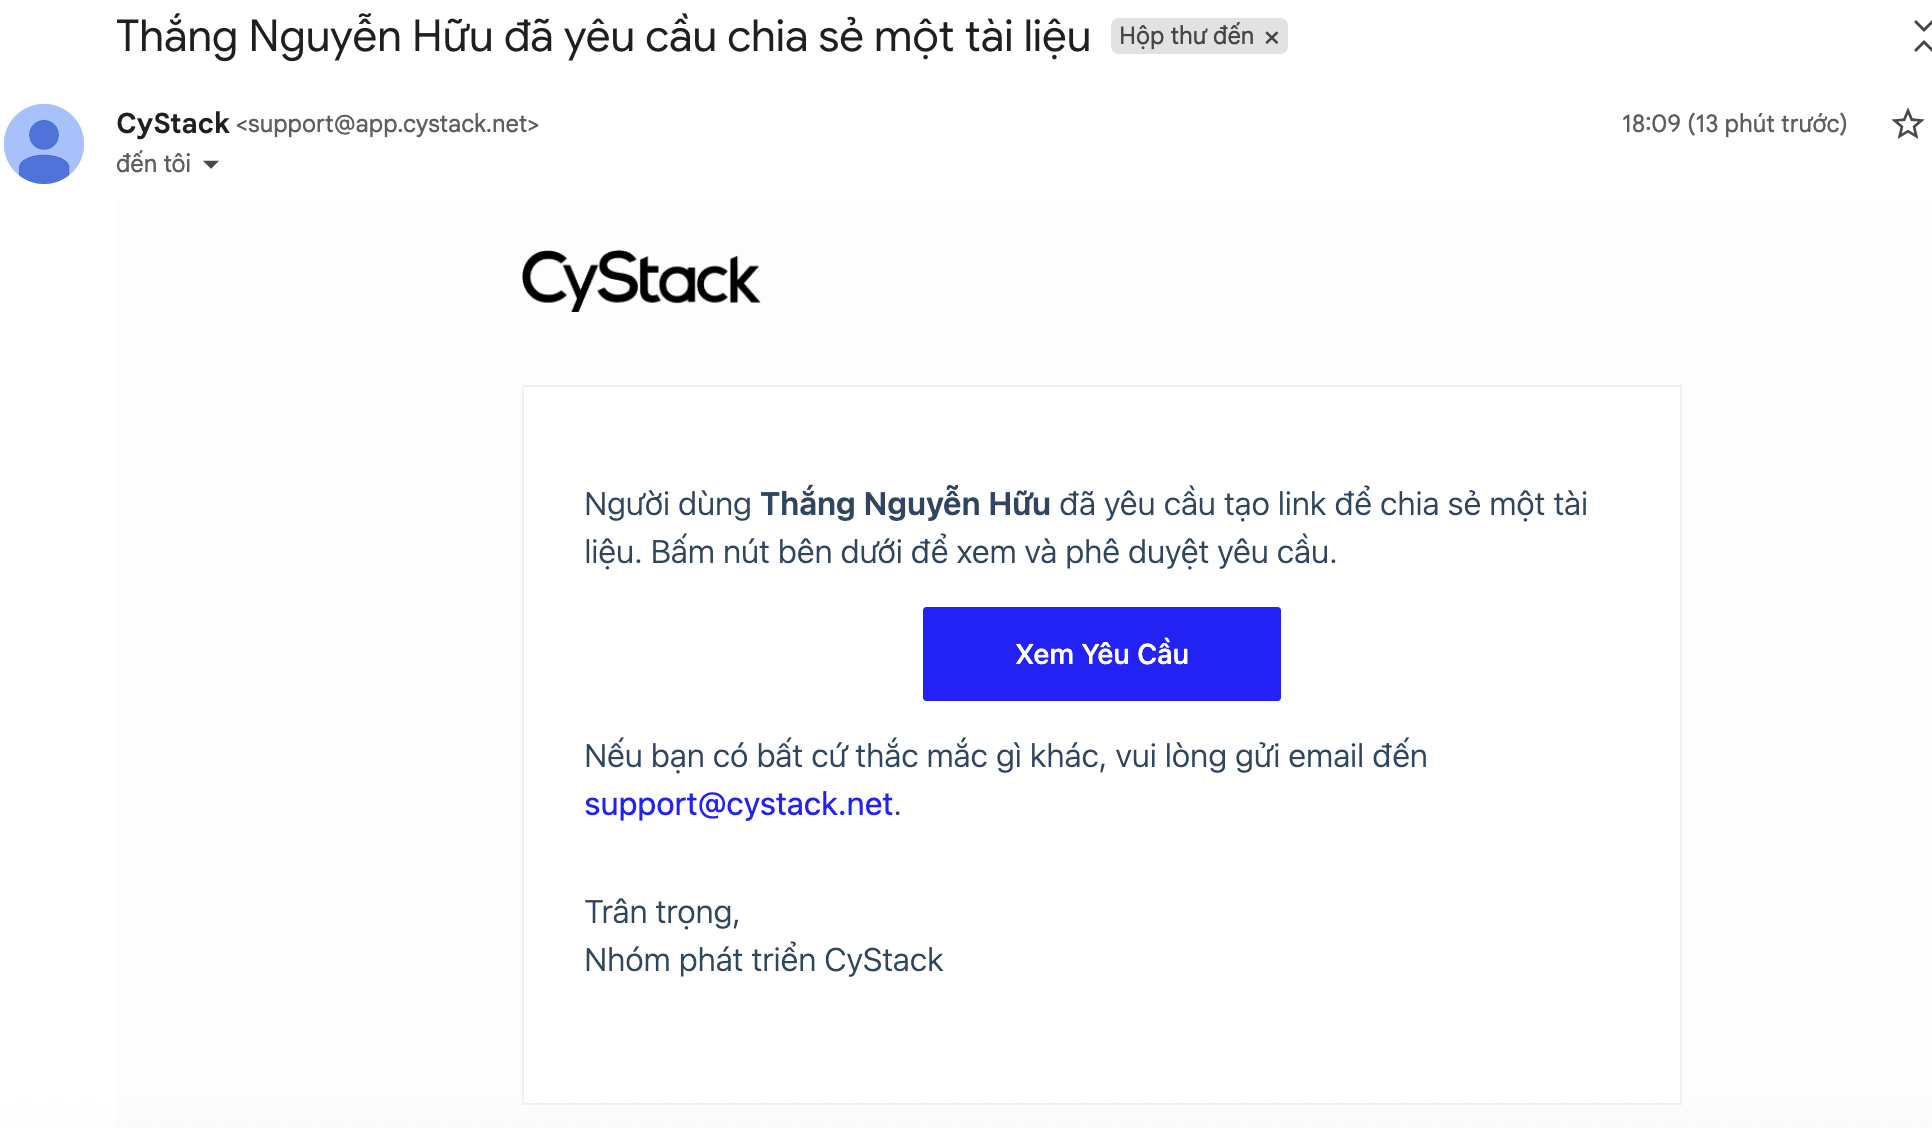
Step 2: Receive notifications and view pending requests
When an employee creates a sharing request, the Approver will receive an Email notification.Open the notification Email and click View Request.
Or go directly to: Device Management → Data Protection → File Sharing via Link → Link Requests tab.
Step 3: Preview the document before approving
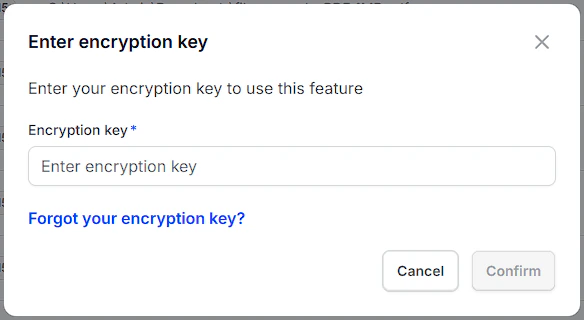
Before granting permission, Approvers should preview the document content to ensure no sensitive information is being shared externally.In the request list, click the eye icon (👁) corresponding to the file to be reviewed.
Enter the Security Key and click Confirm (only required once per session).
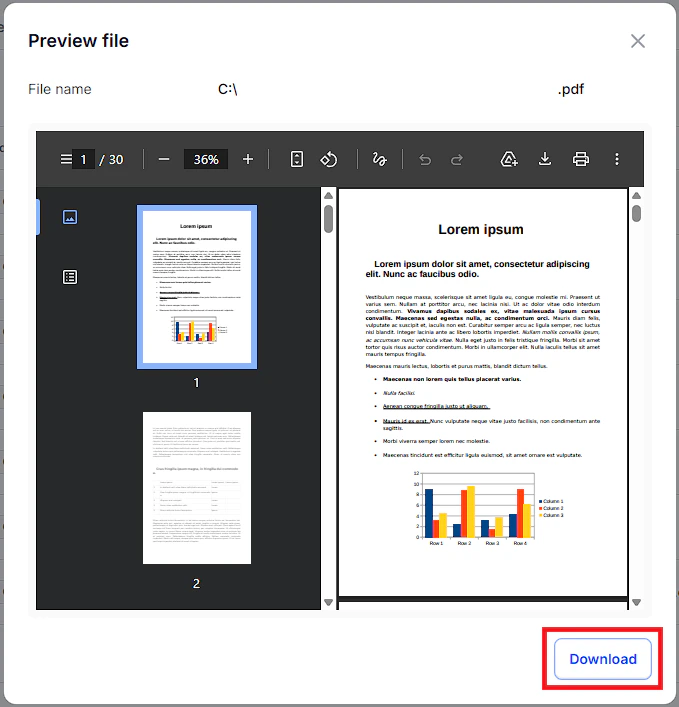
File content is displayed directly on screen. Click Download if you need to save it to your computer.
Step 4: Approve or Reject the request
In the pending request list, click ⋮ corresponding to the file.
Select Allow to grant link creation permission, or Reject (with a reason if necessary).
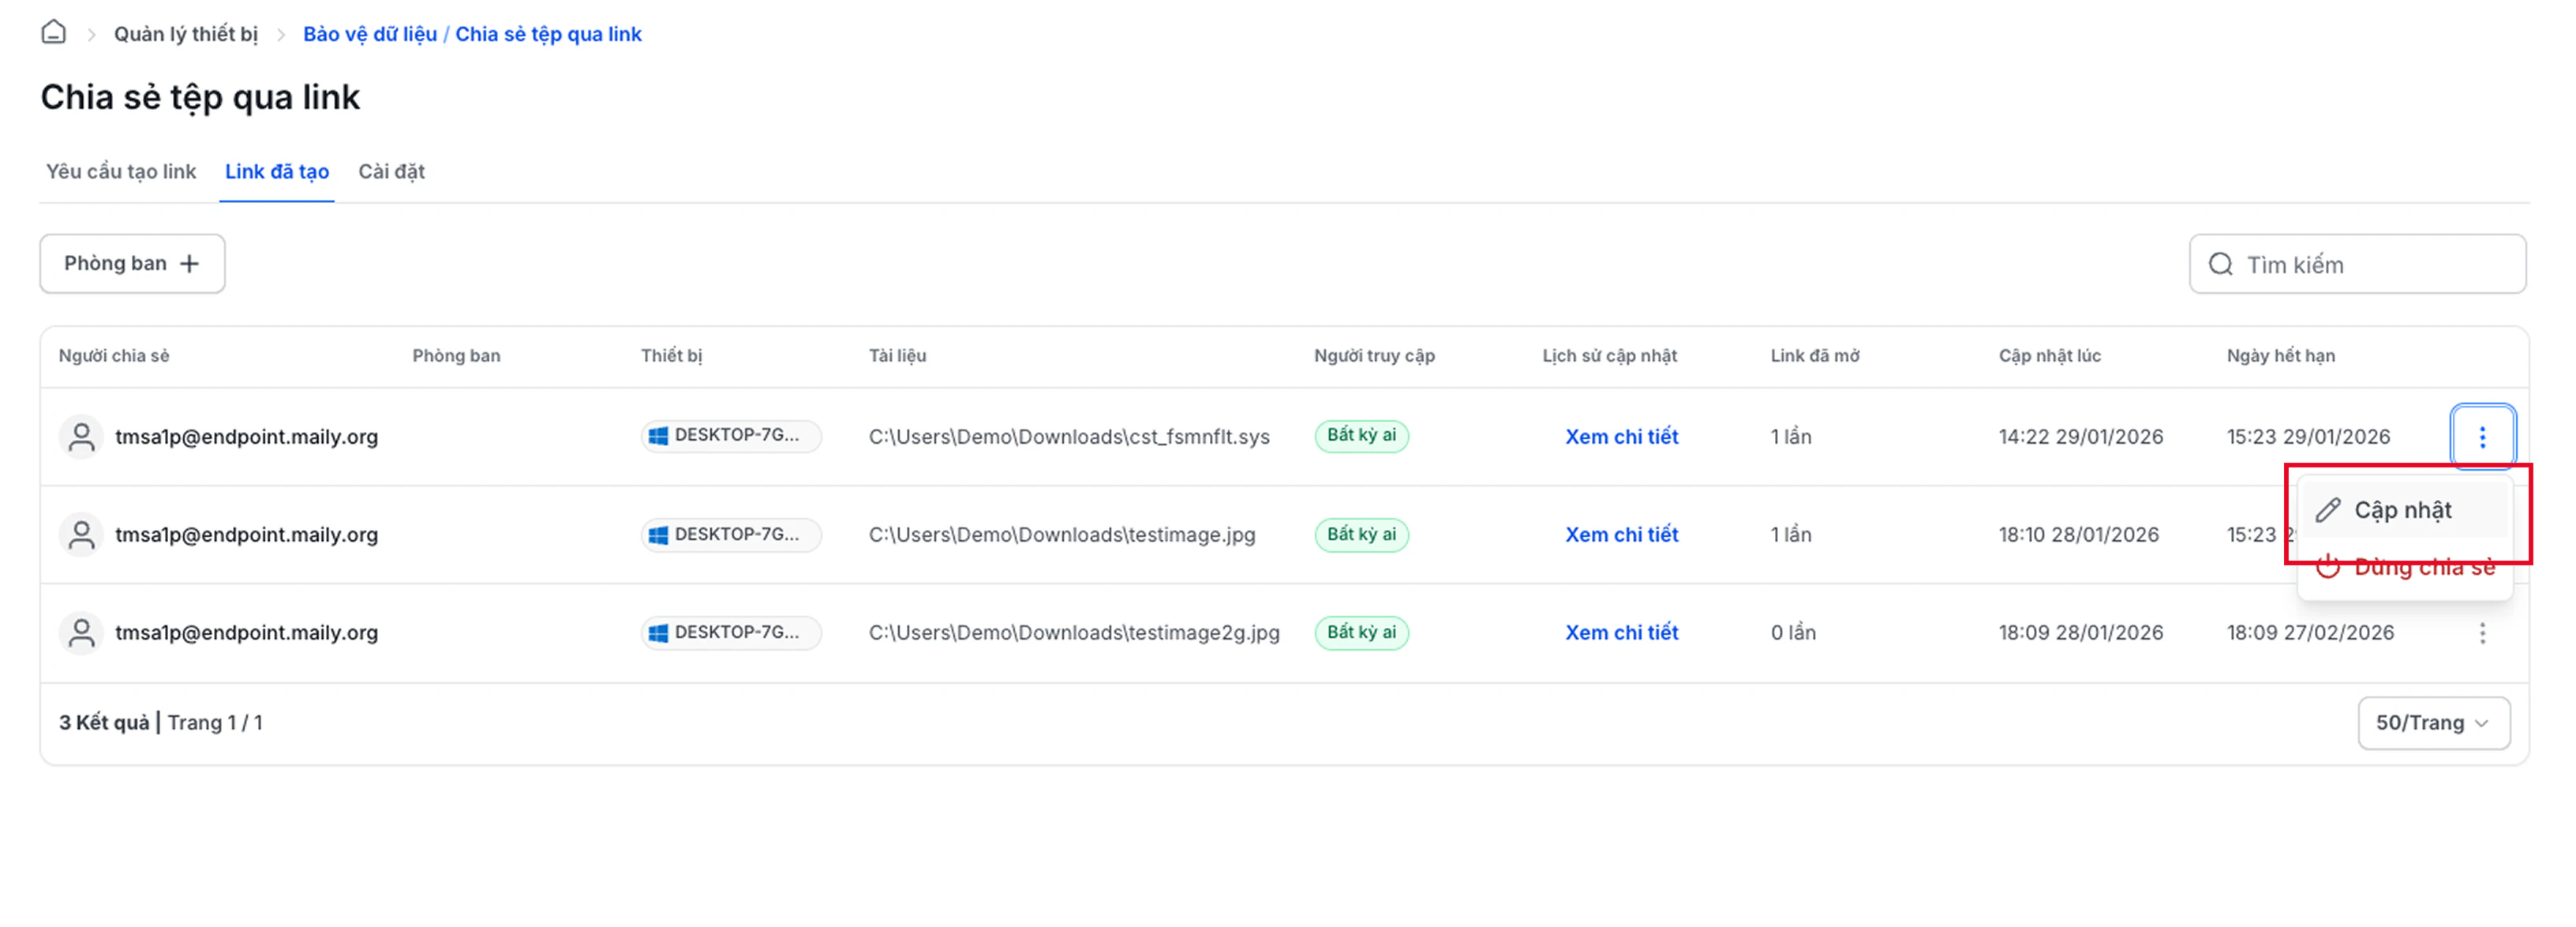
Managing links after approval
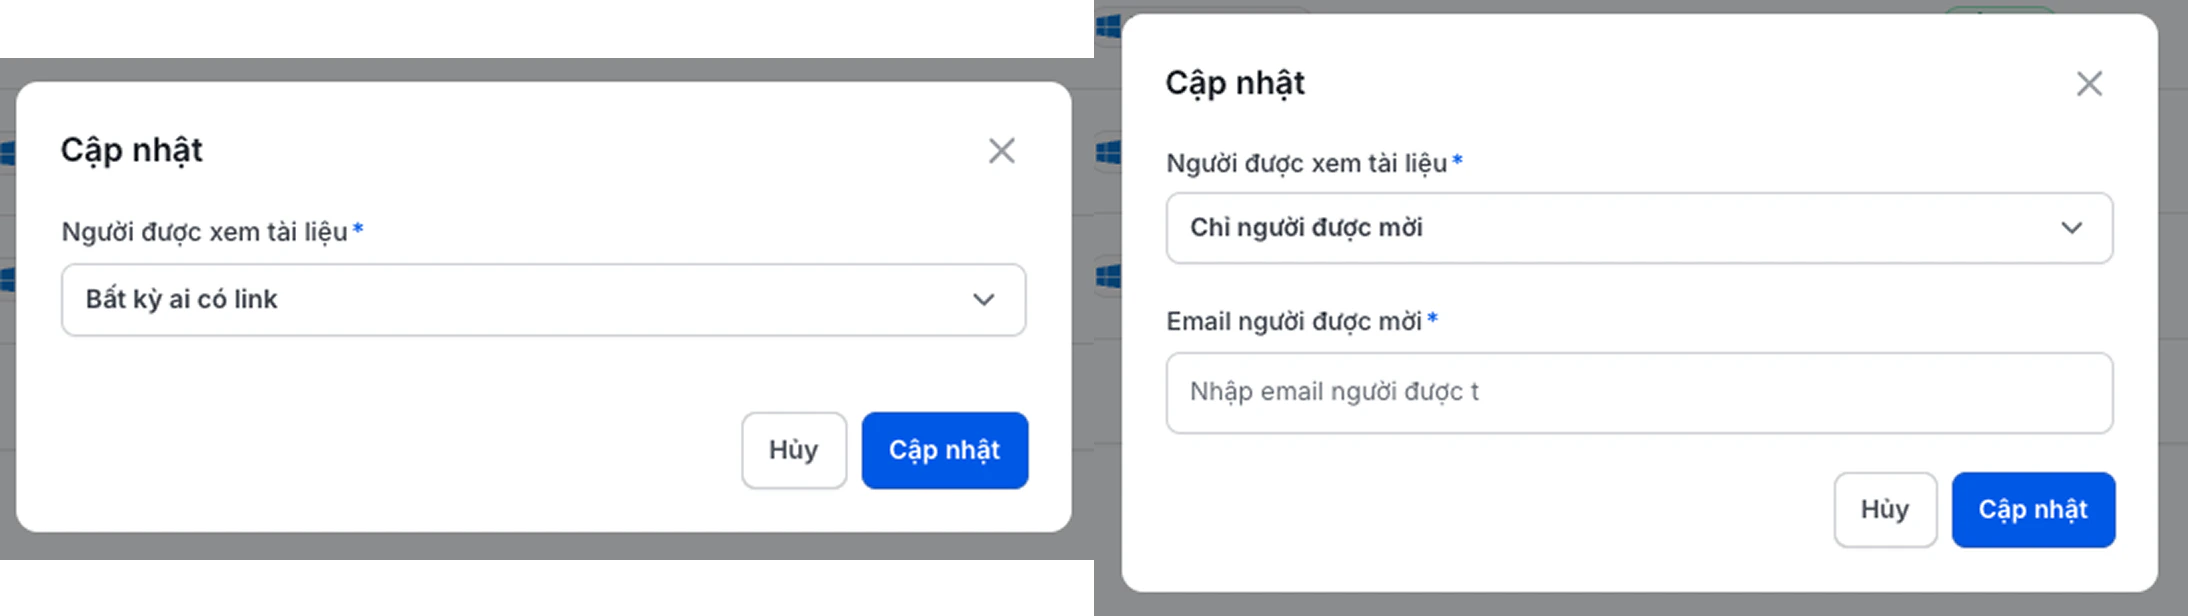
Approvers can adjust access permissions or revoke links at any time in the Created Links tab. Update Viewers:Click ⋮ corresponding to the link → select Update.
Update the list of authorized Emails or switch to public mode (Anyone).
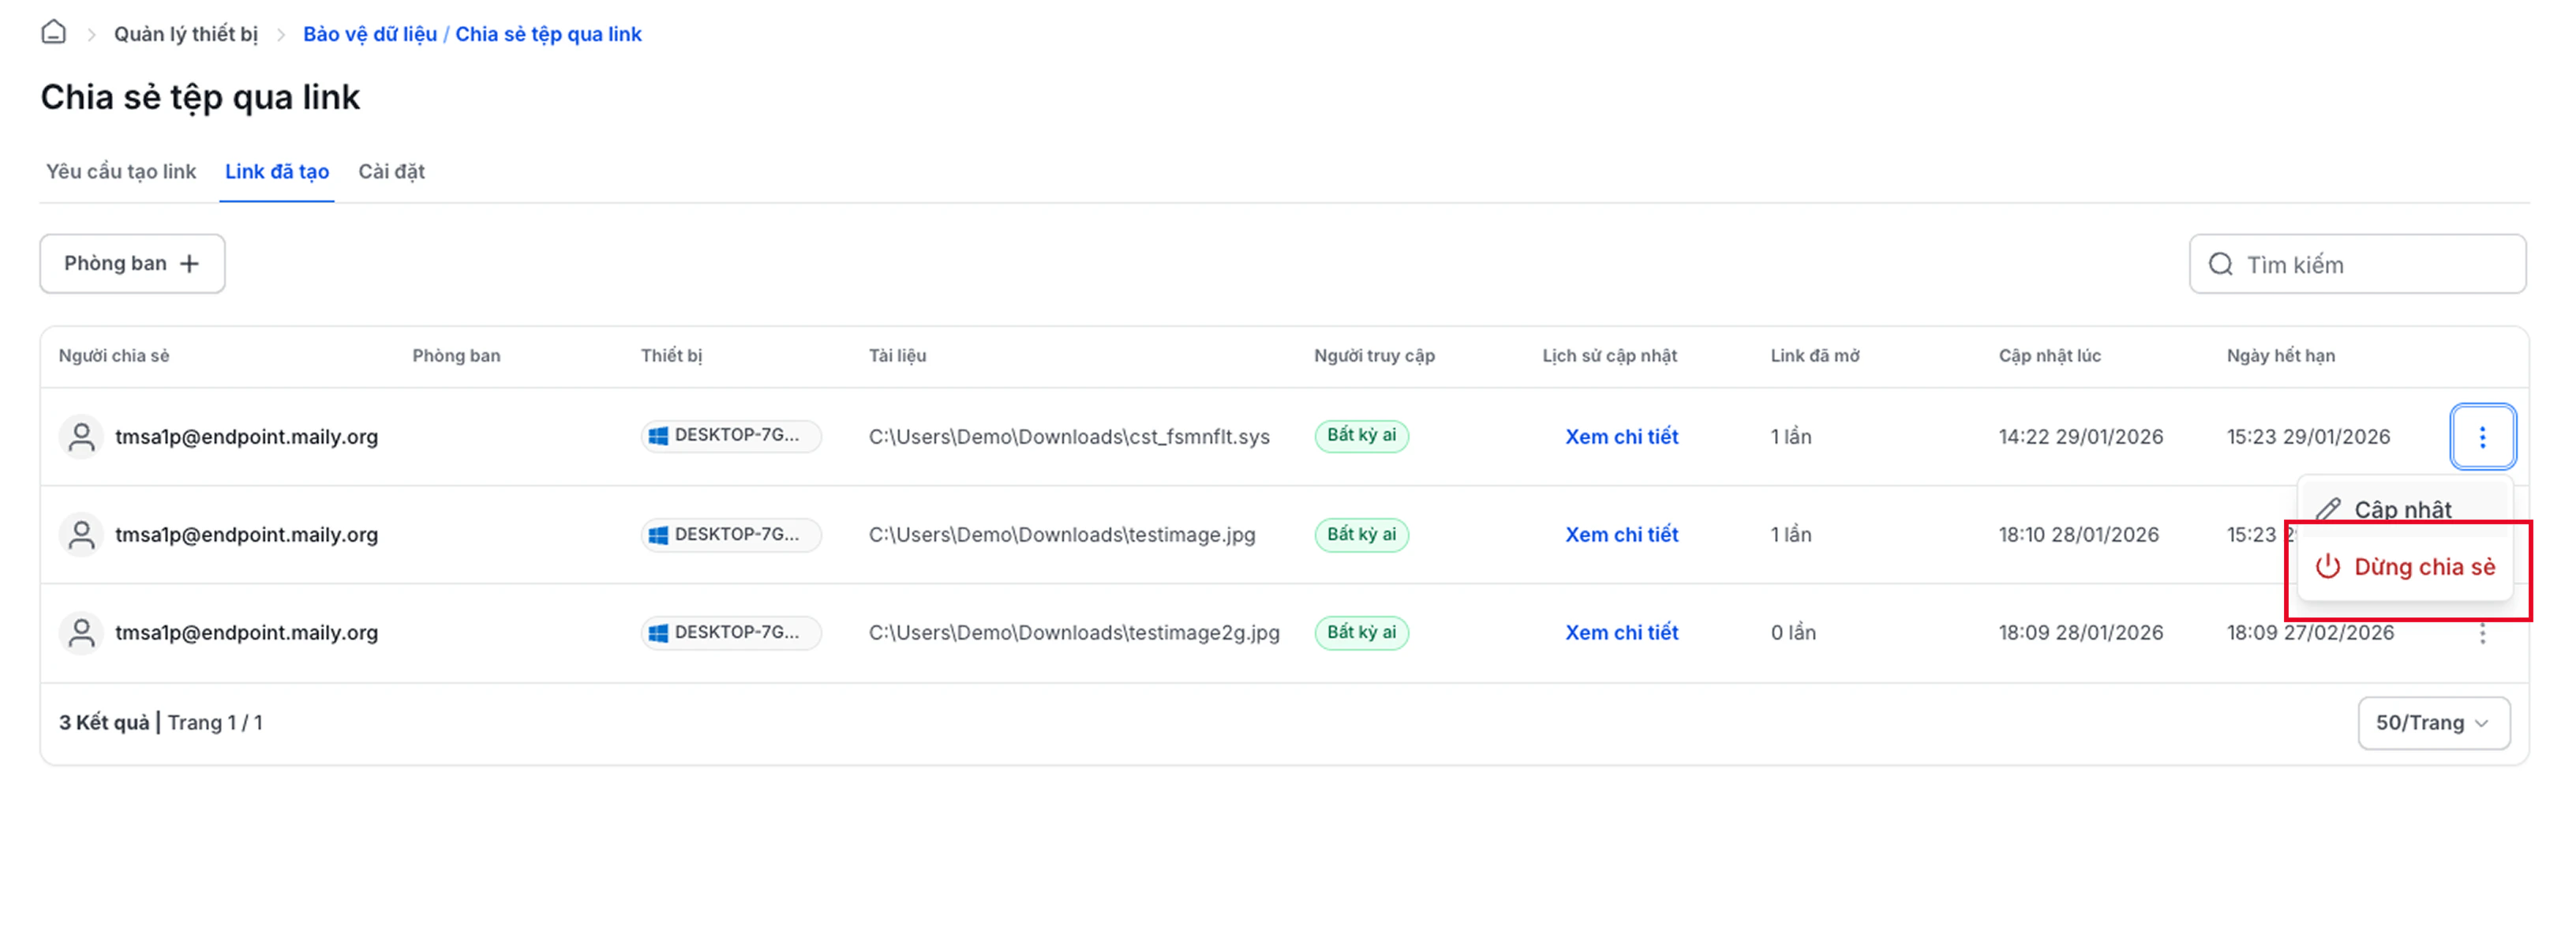
Click ⋮ corresponding to the link → select Stop Sharing → Confirm.
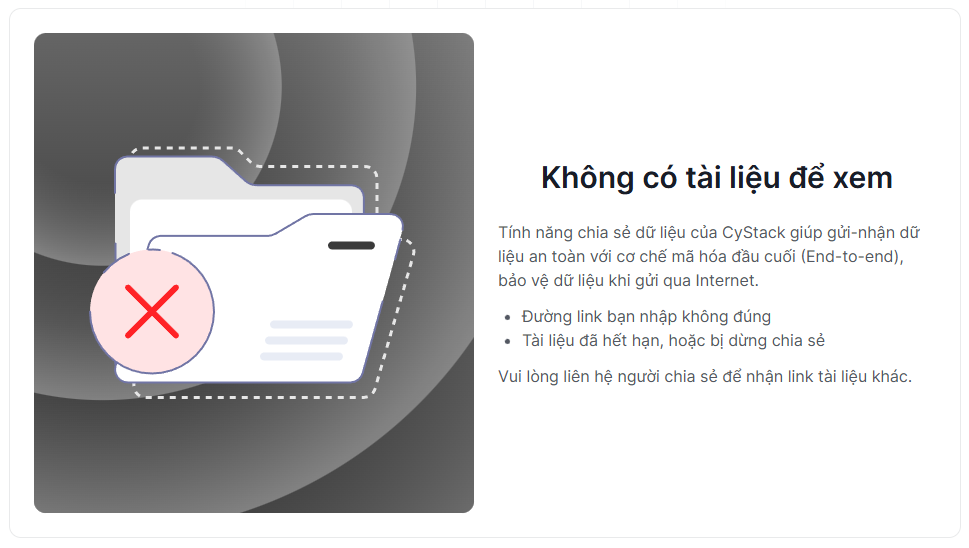
Recipients will see a No Document message when accessing a revoked link.
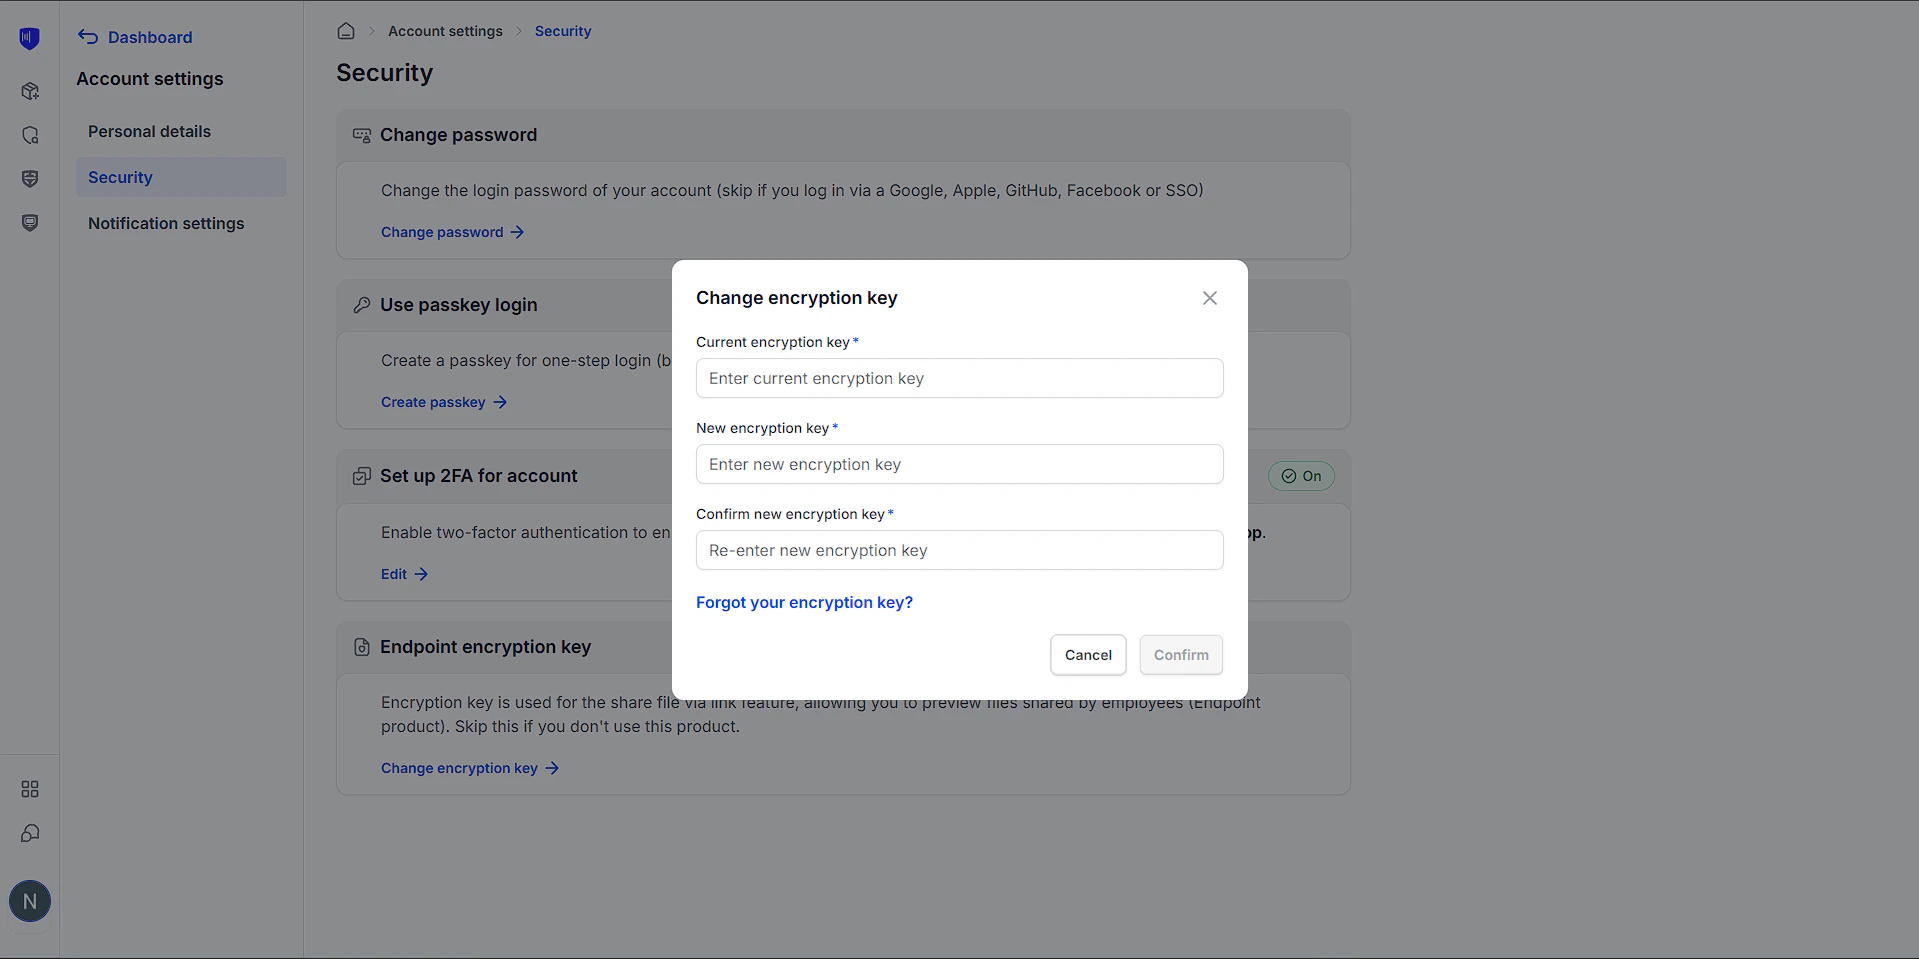
Security Key Management
Change Security Key
Go to: Account Settings → Security → Security Key for Device Management → ClickChange Security Key.
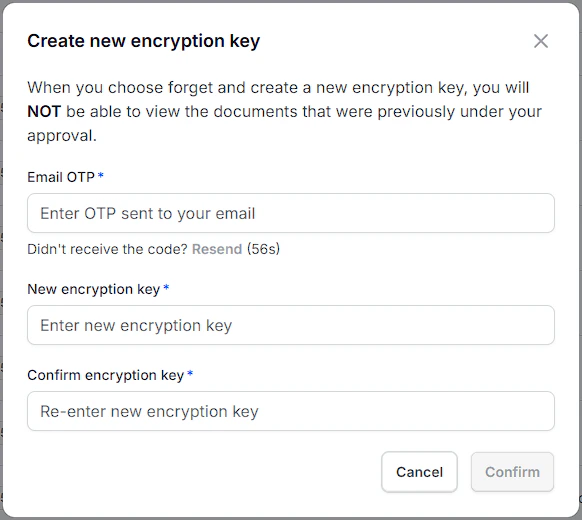
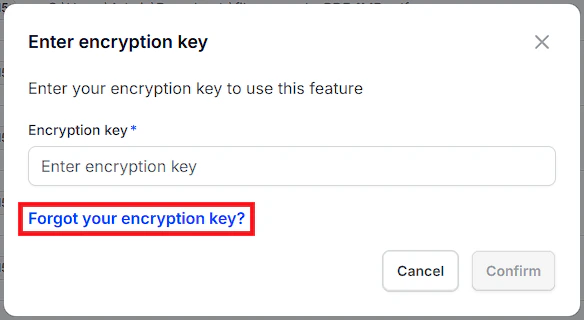
Forgot Security Key
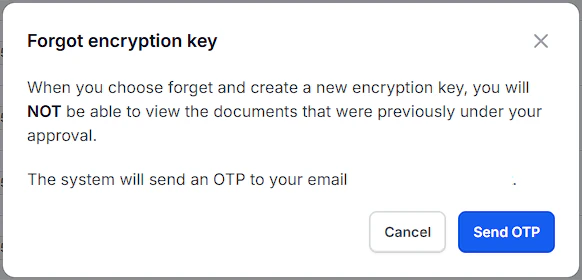
You can reset the key via OTP verification sent to your Email.In the key entry Popup, select Forgot Security Key.
Confirm the warning and click Send OTP.
Enter the OTP from your Email, then set up a new Security Key.