Use Cases
- In the event of a hard drive failure or device theft, you can retrieve the latest data snapshot to minimize downtime and get employees back online quickly.
- If data is encrypted by ransomware or files are maliciously deleted, clean data can be restored from previous backups, mitigating business impact.
- When provisioning new devices or during employee transitions, critical data can be seamlessly transferred to the new hardware.
Backup via AWS S3 Storage
AWS Configuration for CyStack Endpoint
-
Prerequisites: Ensure you have an account with appropriate permissions for IAM and S3 services. Generate a security key and run the following command to configure AWS CLI credentials, enabling the CLI to interact with AWS services:
-
Replace the placeholders
[USER_NAME],[REGION],[ACCOUNT_ID],[BUCKET_NAME],[ROLE_NAME], and[POLICY_NAME]with your actual values.
1. User
1
Create a new user:
2
Create an access key for the user:
3
4
Verify user information:
5
Save the user arn from the output:
2. Bucket
1
Create a new bucket:
2
Enable versioning:
3
The AWS value is the
user ARN value in the previous section.4
Attach the policy to the bucket:
3. Create Necessary Roles
1
2
- Windows
- Linux & macOS
3
4
Create and attach the policy:
- Windows
- Linux & macOS
5
6
- Windows
- Linux & macOS
4. Configure Connection from CyStack Endpoint to Storage Repository
1
2

3
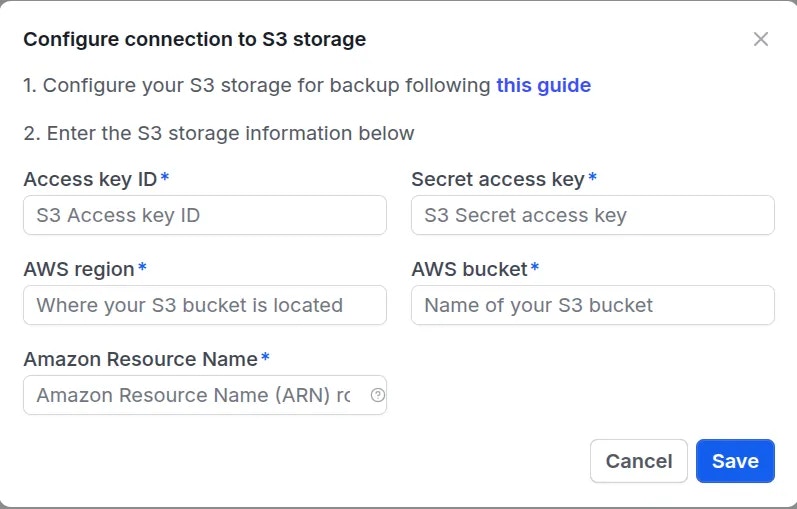
4
.doc, .docx, .odt, .ott, .pages, .xls, .xlsx, .csv, .ods, .numbers, .pdf, .ppt, .pptx, .odp, .key
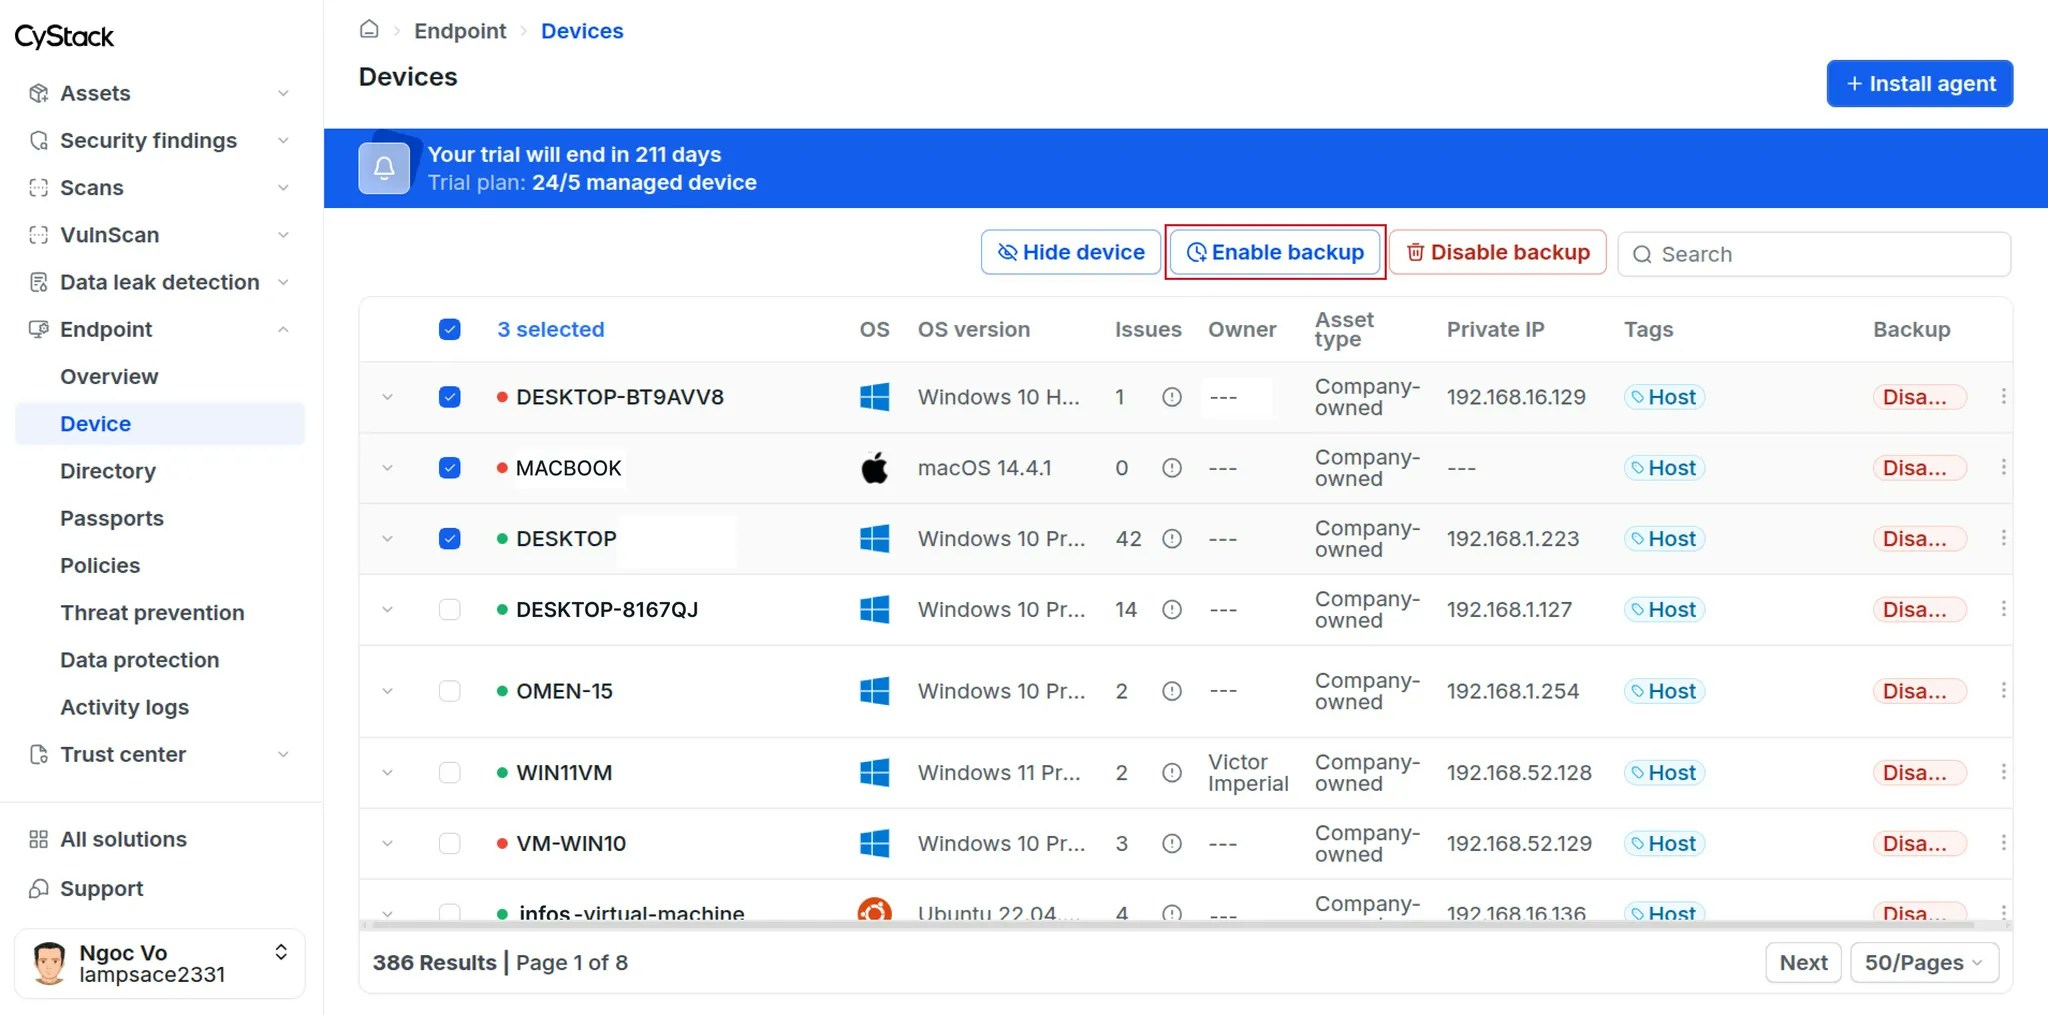
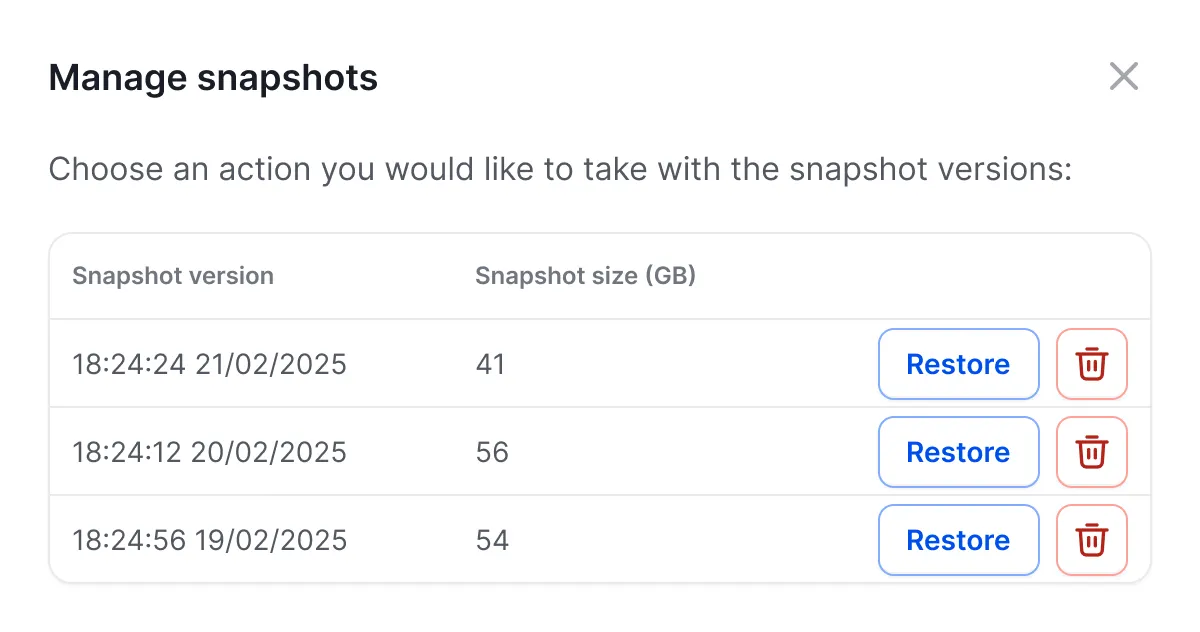
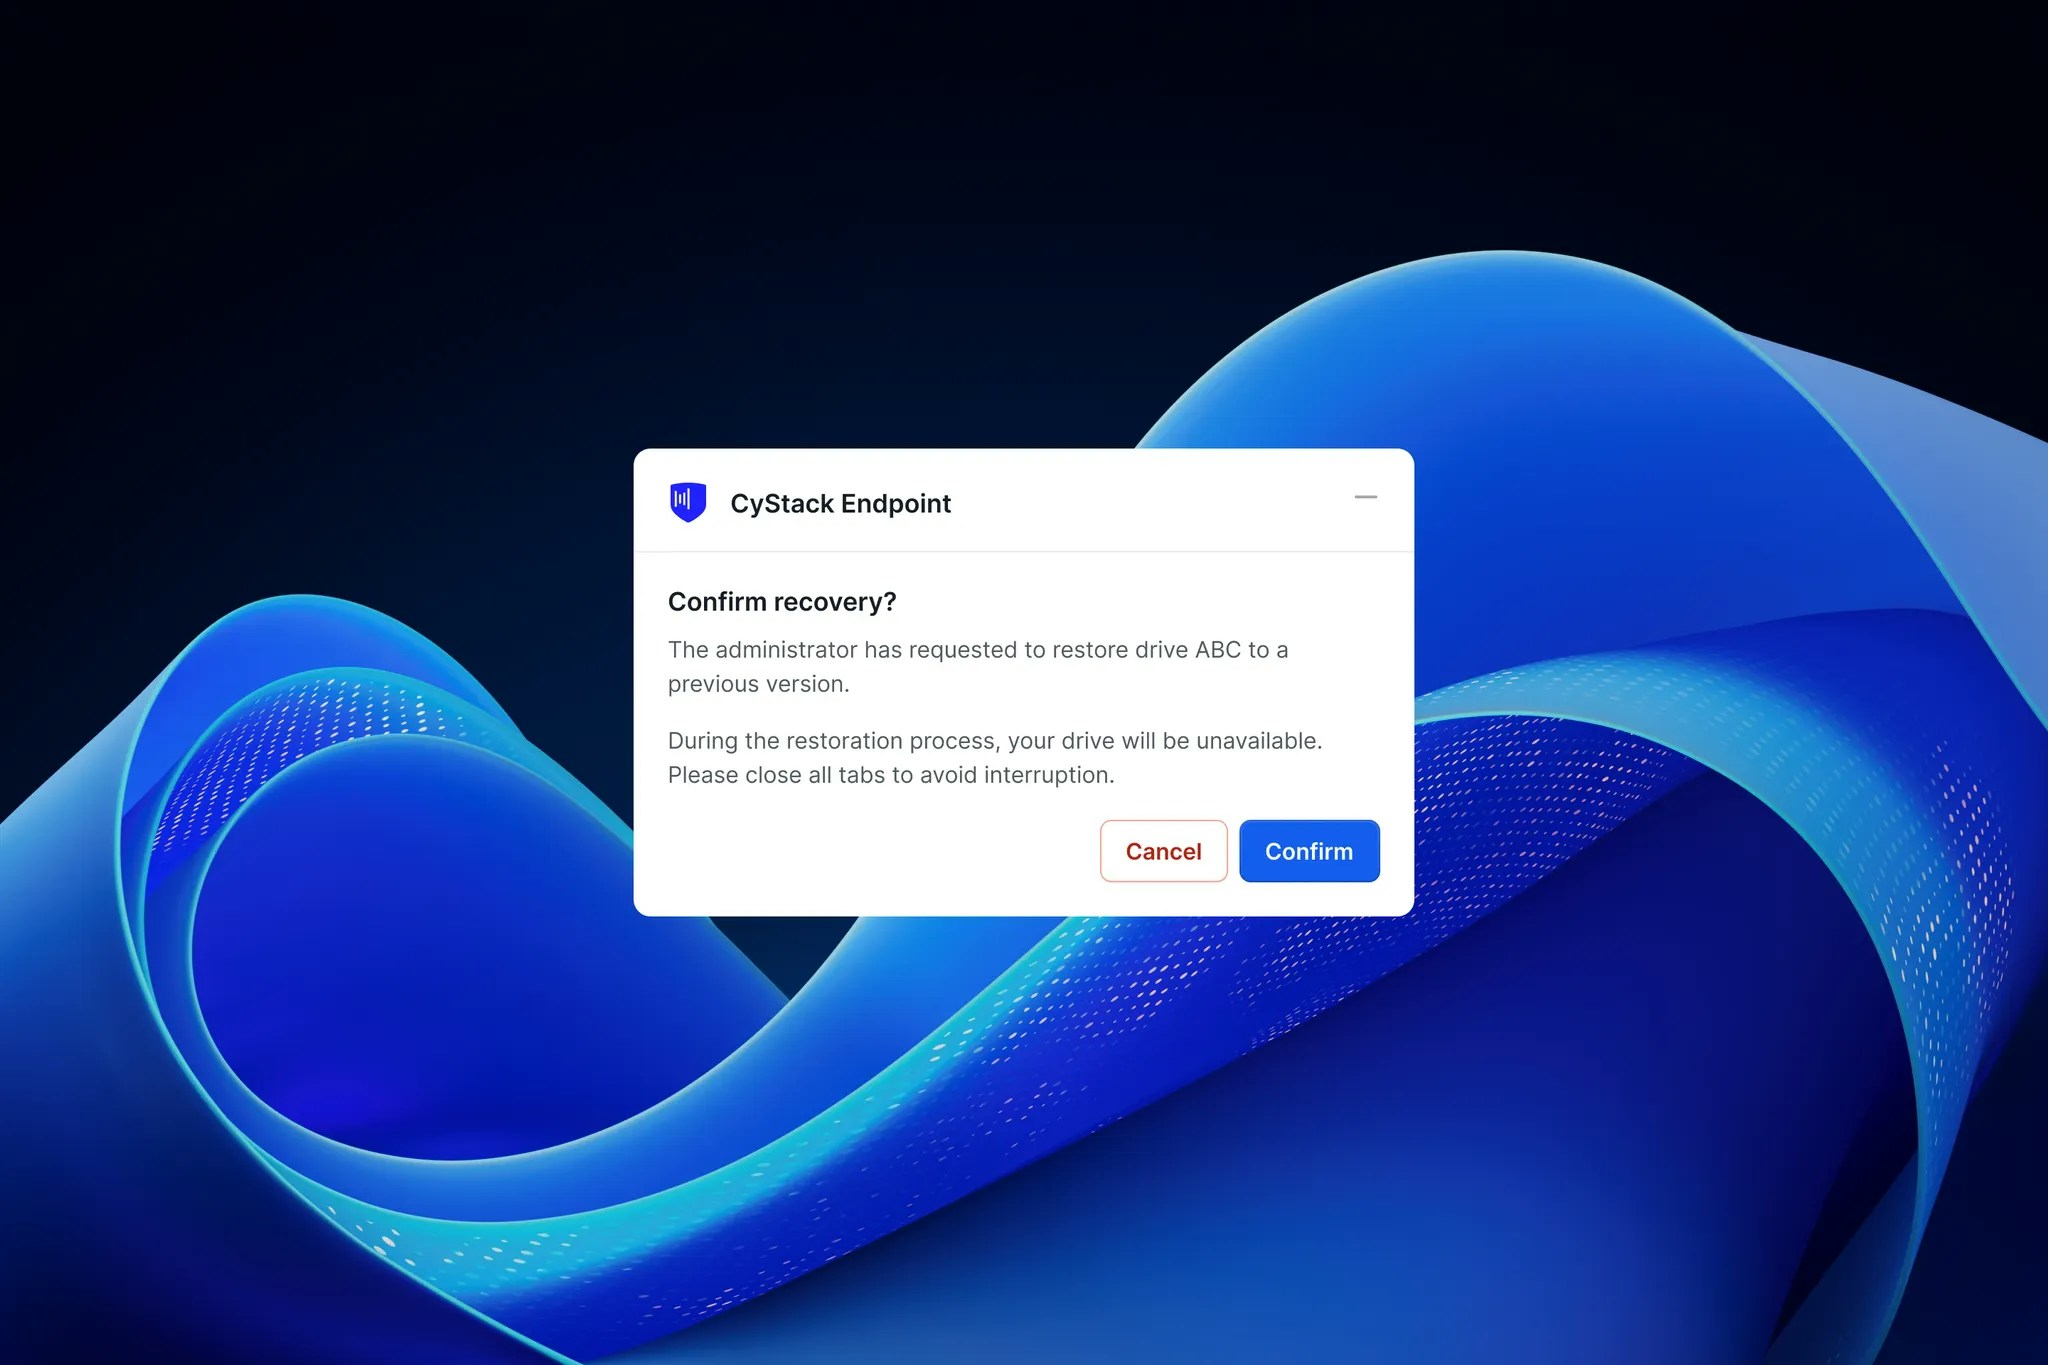
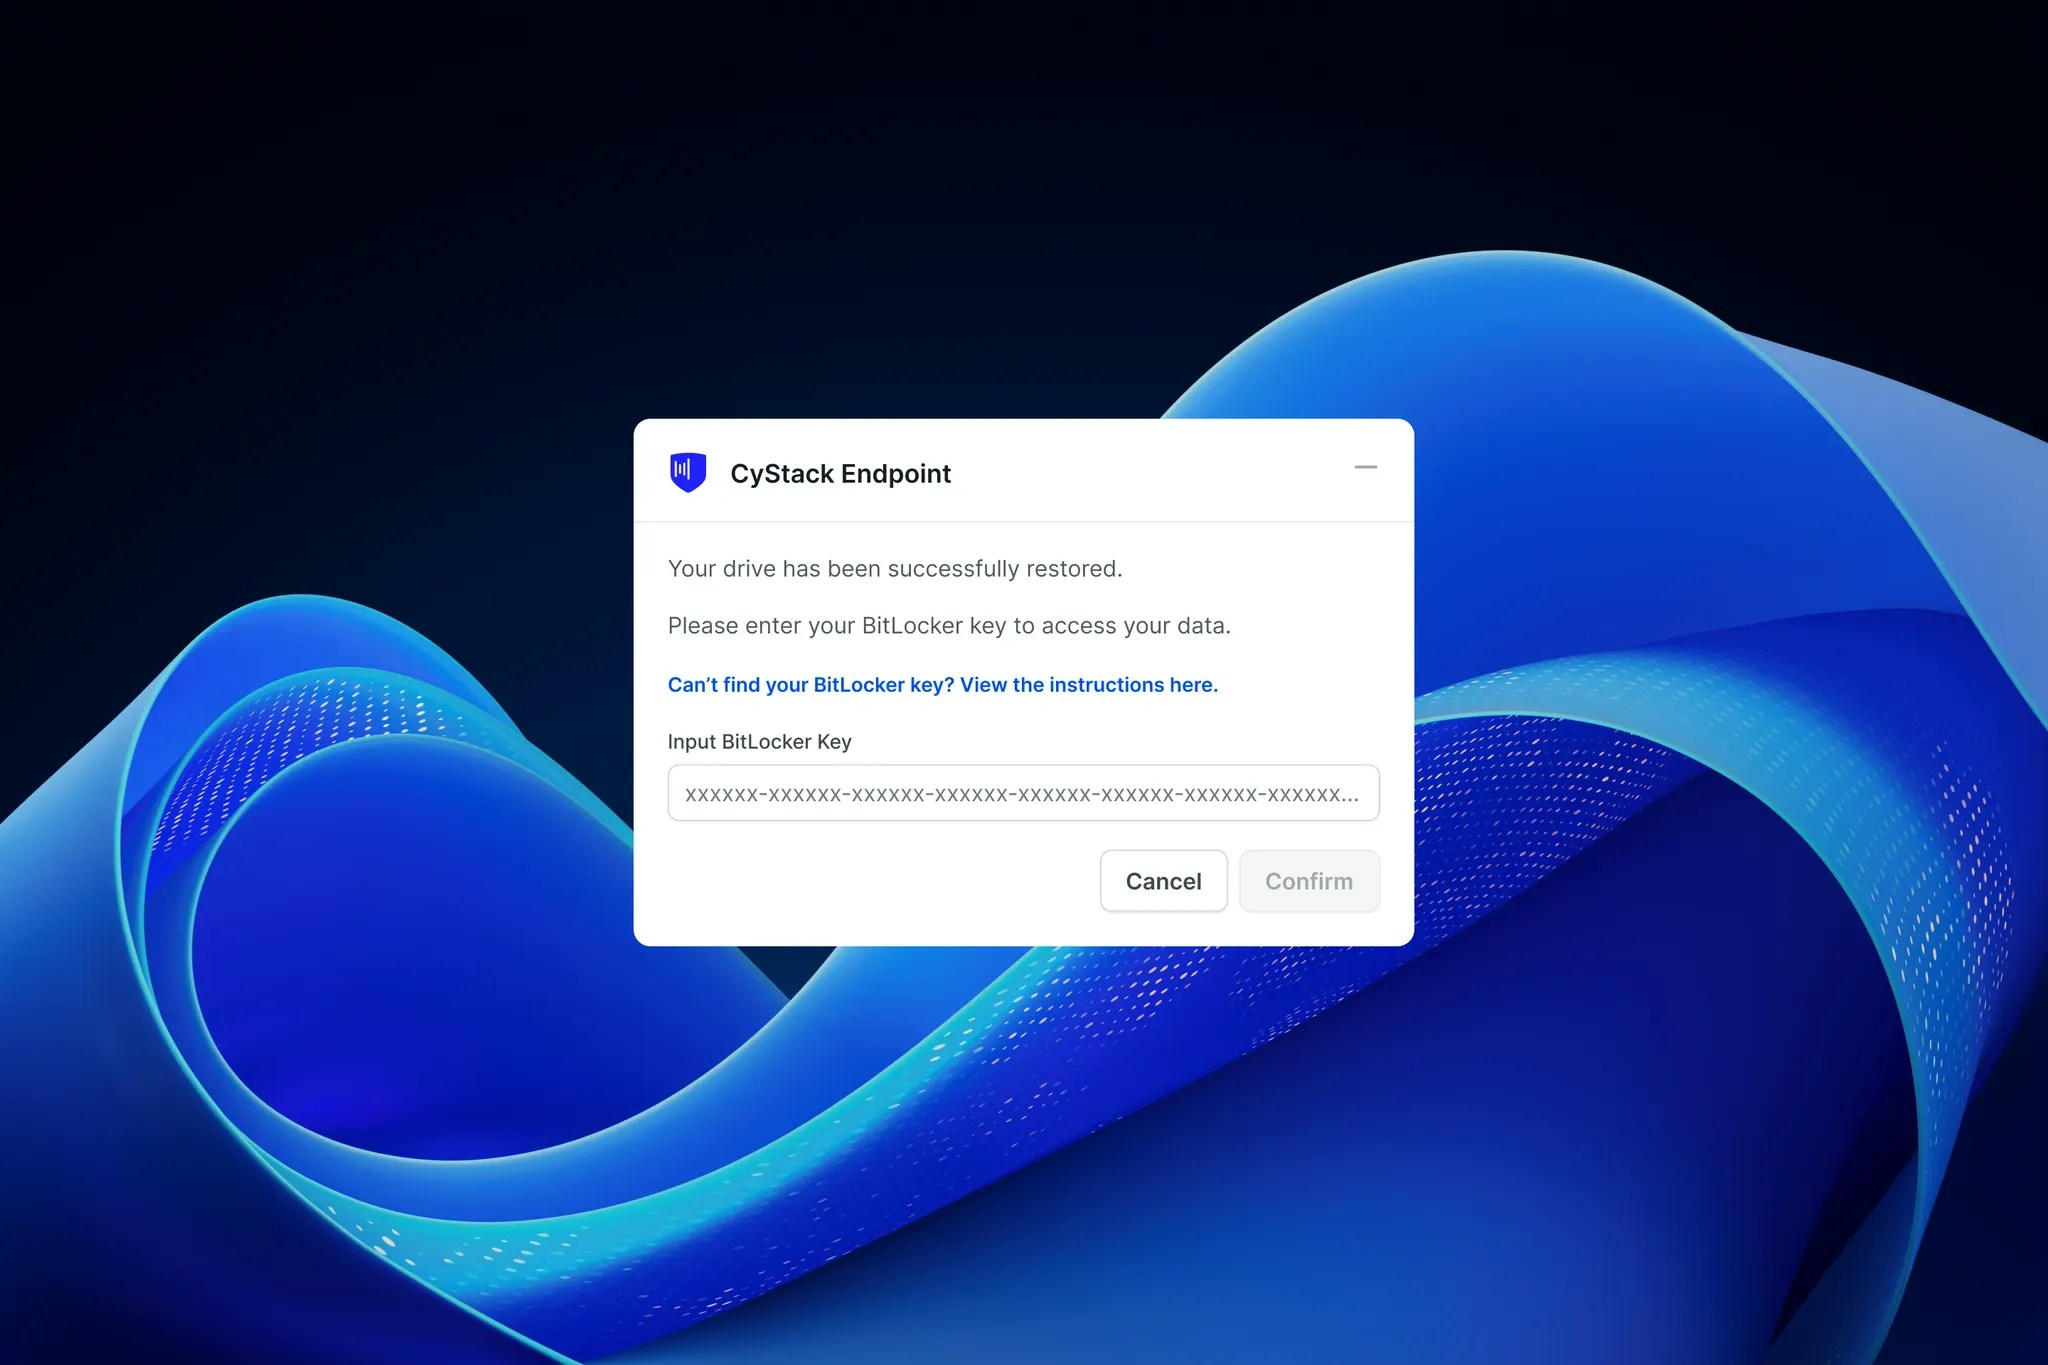
Data Recovery
In the event of device failure or data loss due to ransomware, business users can request the Workspace Owner or Administrator to restore their data. The Owner or Administrator should follow these steps to initiate recovery:1

2
3
4
5
6