Before Starting a Scan
Confirm these items before scanning production systems:- The target is inside the active license scope.
- The asset detail page shows the expected host, service, WAF/CDN, TLS, and technology context.
- The scan window is approved by the asset owner.
- Authenticated context is prepared if the application requires login.
- Mail delivery is configured if the team expects scan-completed notifications.
- The target can safely receive automated security testing traffic.
Start a Scan in the Web UI
- Open Assets.
- Select the asset to assess.
- Review discovery on the asset detail page.
- Choose Start scan.
- Review target scope and scan options.
- Add authentication context if needed.
- Submit the scan.
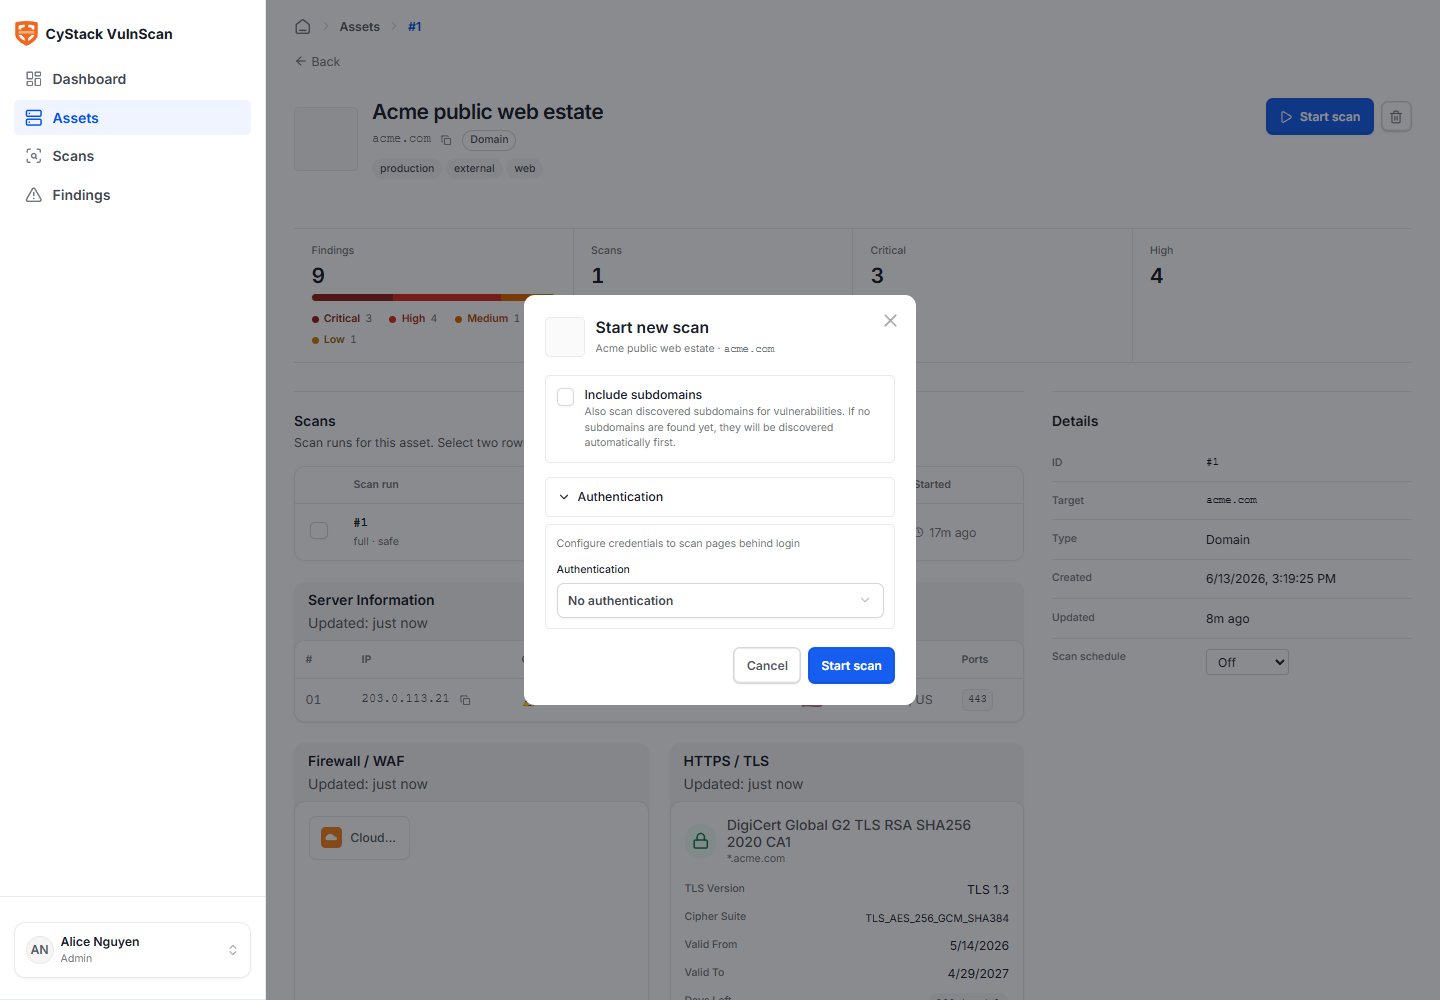
Authentication Context
Authenticated scanning improves coverage for applications where important functionality is not visible to anonymous users. Supported request context includes:| Context | Use Case |
|---|---|
| Cookie | Scan a web application with a prepared logged-in session. |
| Custom header | Pass API keys, bearer tokens, tenant IDs, staging access headers, or internal routing headers. |
| Basic Auth | Access sites protected by HTTP Basic Authentication. |
Scan Lifecycle
| Status | Meaning |
|---|---|
| Queued | The scan request has passed validation and is waiting for a worker. |
| Running | Discovery, fingerprinting, detection, enrichment, and persistence are in progress. |
| Completed | The scan finished and findings are available for triage and export. |
| Failed | The scan could not complete. Review the error and logs. |
| Canceled | The scan was stopped before completion. |
Scan Detail
The scan detail page is the operational view for one scan.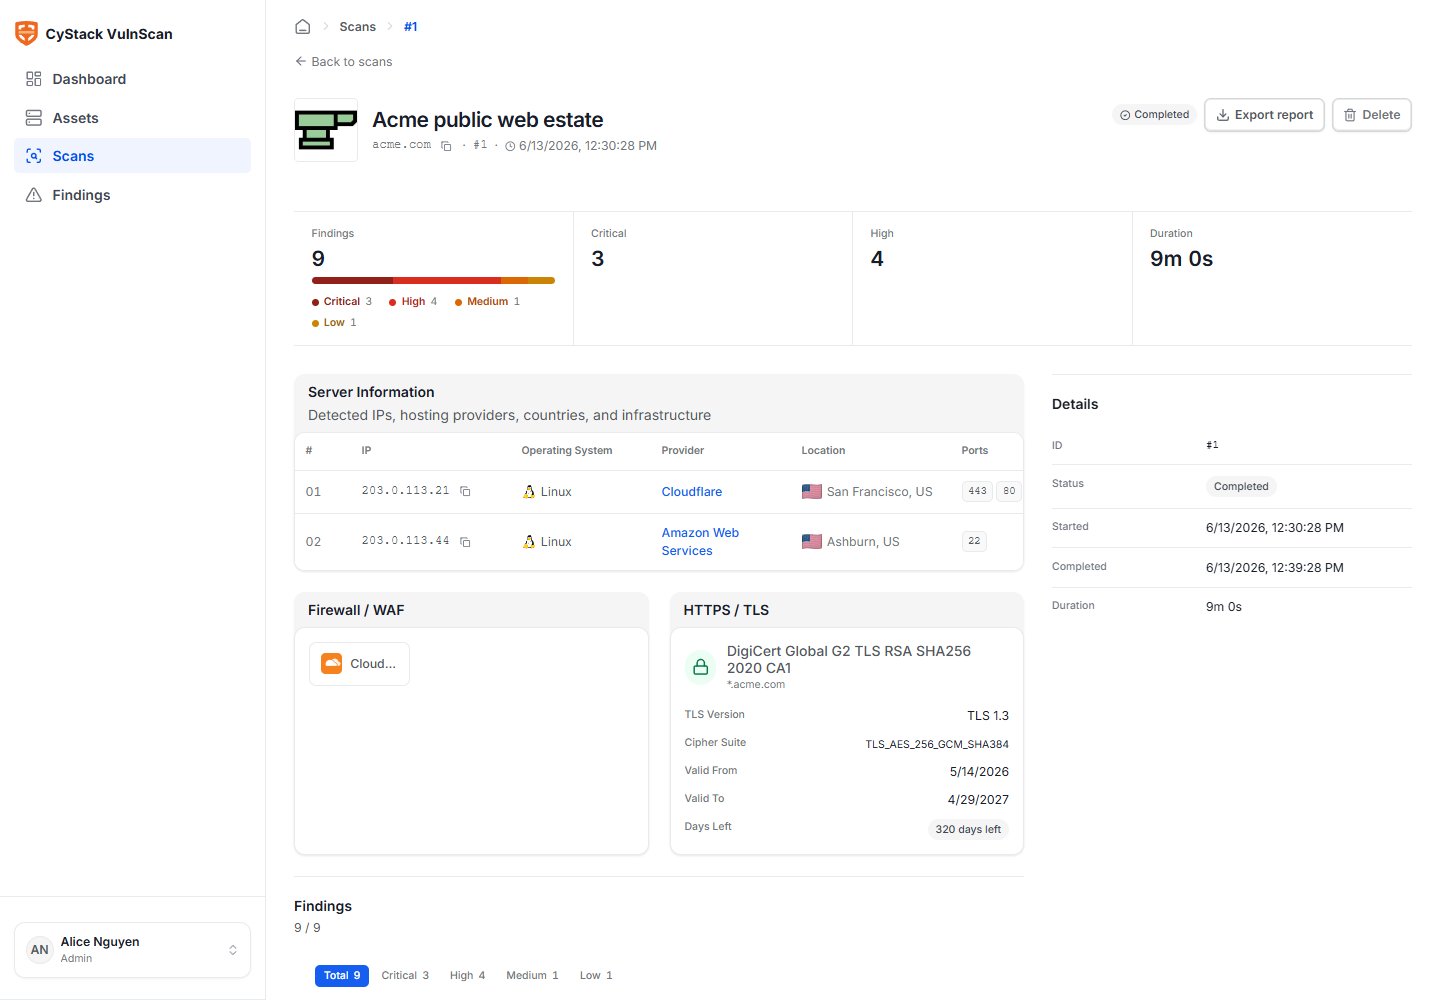
- Scan source: Web UI, CLI, or scheduled job.
- Start time, finish time, duration, and current status.
- Target and asset linkage.
- Discovered hosts, services, technologies, and URLs.
- Finding counts by severity.
- Critical and High findings requiring immediate review.
- Report export actions.
What Happens During a Scan
- License validation checks target permission and target count.
- Discovery identifies live hosts, subdomains, ports, web services, TLS, WAF/CDN, and metadata.
- Fingerprinting identifies products, versions, frameworks, components, banners, and CPE candidates.
- Detection runs native vulnerability checks, product-specific checks, unauthenticated service checks, and known-CVE matching.
- Enrichment adds CVSS, EPSS, CISA KEV, CWE, OWASP Top 10, OWASP WSTG, remediation, and references.
- Deduplication merges duplicate findings and preserves the strongest evidence.
- Risk scoring calculates a 0-100 risk score based on severity, exploitability, confidence, and verification signals.
- Persistence writes scan metadata, findings, assets, and reports into the workspace database.
Web, CLI, and Scheduled Sources
Standard scans from the Web UI, CLI, and scheduler are written to the same database. The scan source is stored so teams can audit where a result came from:web: a user started the scan from the Web UI.cli: a user or automation started the scan from the CLI.scheduled: a recurring scan job created the scan.
Accuracy Guidance
To improve accuracy:- Provide authentication context for applications that hide functionality behind login.
- Scan canonical hostnames rather than only raw IP addresses for virtual-hosted web applications.
- Keep vulnerability intelligence data updated.
- Use focused scans for complex applications before expanding to all subdomains.
- Re-scan after remediation to verify fixes.
- Treat low-confidence or unusual findings as review candidates rather than immediate remediation tickets.
Large Scans
For large domains or CIDR ranges:- Start with discovery and inventory review.
- Split critical applications into separate assets.
- Use tags to group remediation owners.
- Schedule recurring scans outside peak traffic windows.
- Generate PDF reports as background jobs instead of keeping the browser open.
- Use CSV/JSON exports for bulk remediation and integration workflows.