Step 1: Get the Binary and License
CyStack VulnScan is distributed as a binary application for Windows, macOS, and Linux. To receive the program file and the matching license, contact CyStack Sales at sales@cystack.net. CyStack will provide:- The VulnScan binary for the required operating system.
- A license key or offline activation file.
- The licensed target scope, target limit, activation limit, and any deployment notes.
- Optional offline update packages if the scanner will run in a restricted network.
Step 2: Prepare the Host
Choose a host that can reach the assets you are allowed to assess. For a production workspace, prepare:- A stable data directory for the workspace database, exports, logs, and runtime state.
- Outbound network access for license activation and intelligence updates, unless your deployment uses offline activation and offline updates.
- Network access from the VulnScan host to the target domains, IP addresses, CIDR ranges, and web applications.
- SMTP, SendGrid, or AWS SES credentials if you want invitation, scan completion, and report-ready emails.
Step 3: Activate VulnScan
For online activation, run:Step 4: Start the Web UI
Start the Web UI on the default local address: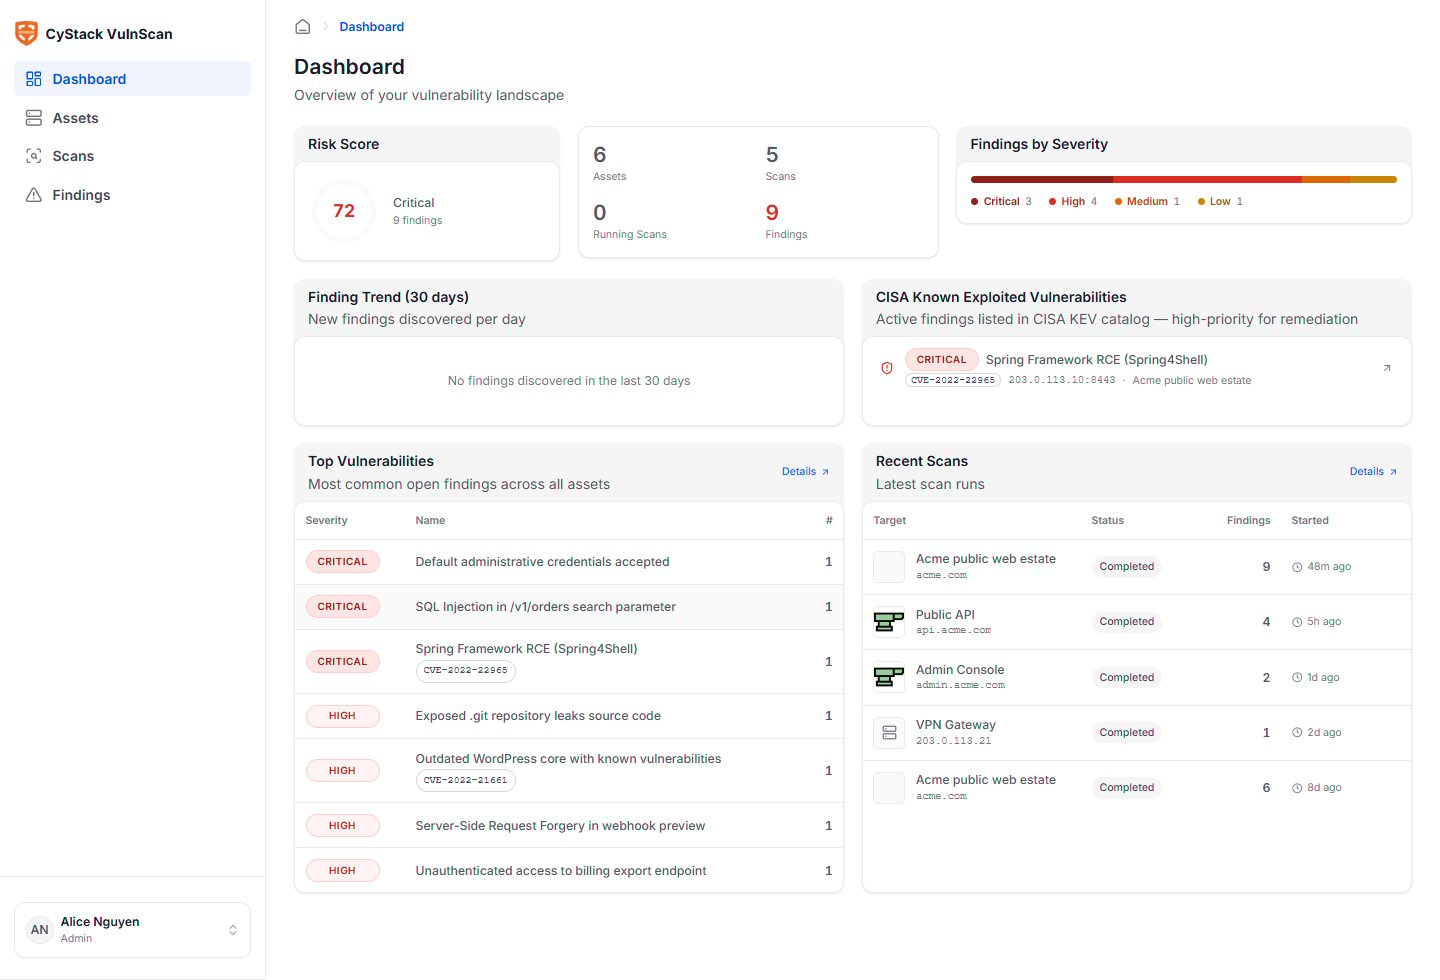
Step 5: Complete Personal Details
Open the user menu and review personal settings:- Set the display name used in member lists, invitations, and email notifications.
- Confirm the email address used for report-ready and scan-completed emails.
- Choose the interface language.
- Change the password if the account was created with a temporary password.
- Use Log out from the same user menu when leaving a shared workstation.
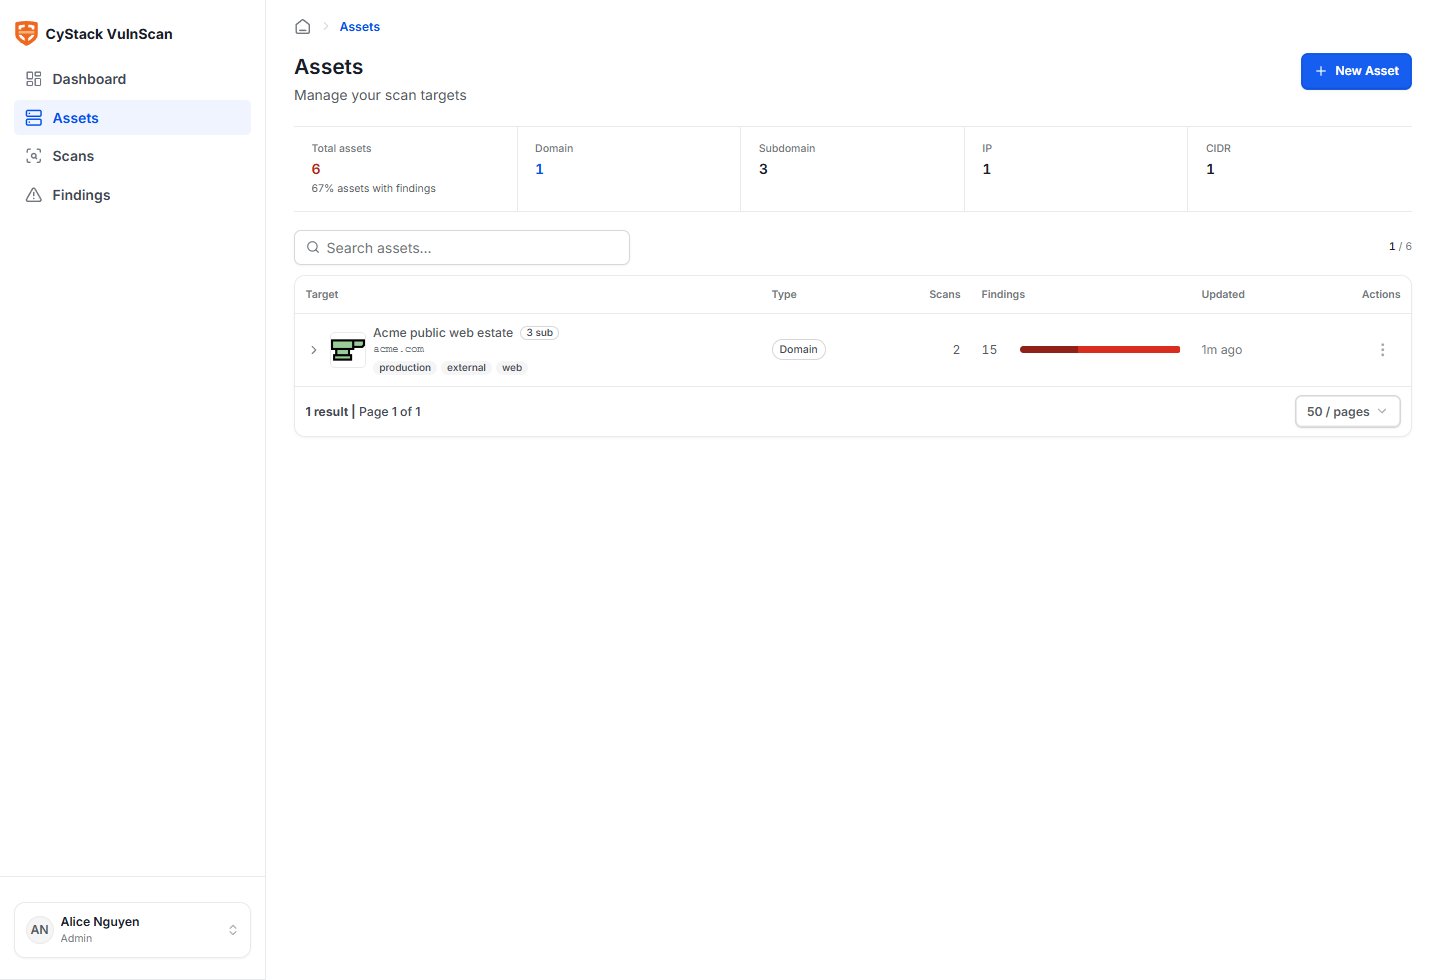
Step 6: Add the First Asset
Go to Assets and choose Add asset. Start with a root domain, public IP address, or CIDR range that is explicitly included in your license.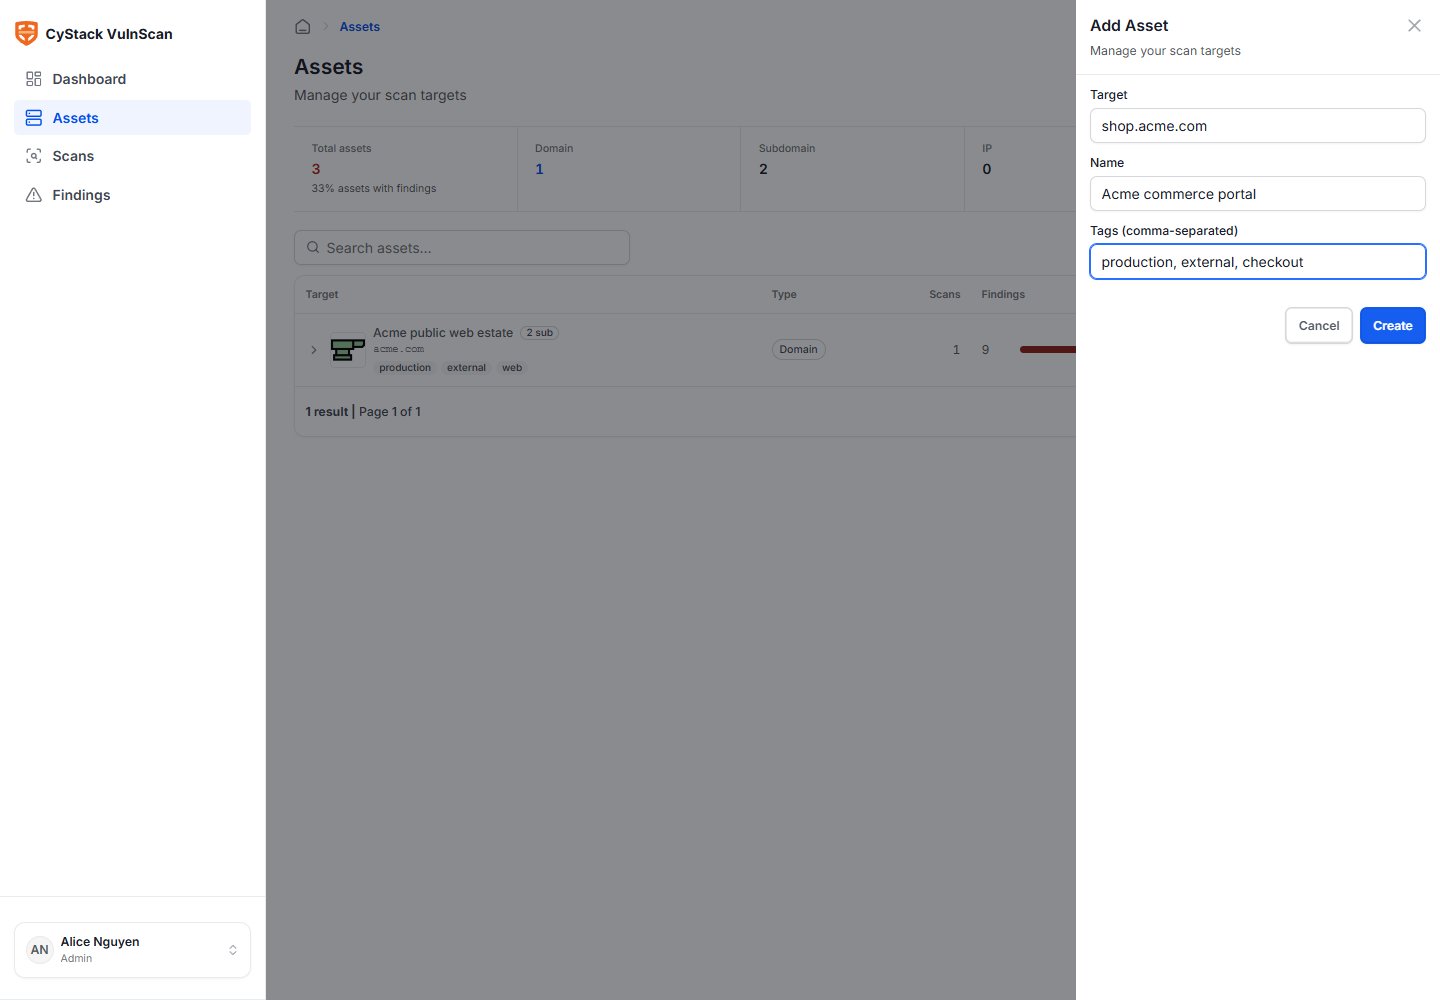
| Asset Type | Example | Use When |
|---|---|---|
| Domain | acme.com | You want subdomain discovery, web discovery, TLS checks, and application checks across a business domain. |
| URL | https://app.acme.com | You want to focus on a specific application entry point. |
| IP address | 203.0.113.21 | You want service exposure and known-CVE detection for one host. |
| CIDR | 203.0.113.0/28 | You want to inventory and scan a small public network range. |
Step 7: Review Discovery
Open the asset detail page before starting a vulnerability scan. Use this page to confirm that VulnScan has the right target context:- Discovered subdomains and live hosts.
- Open web services and protocol services.
- WAF/CDN signals such as Cloudflare, where detected.
- TLS version, certificate validity, issuer, expiry, and configuration health.
- Technologies, frameworks, CMS, plugins, themes, and service banners.
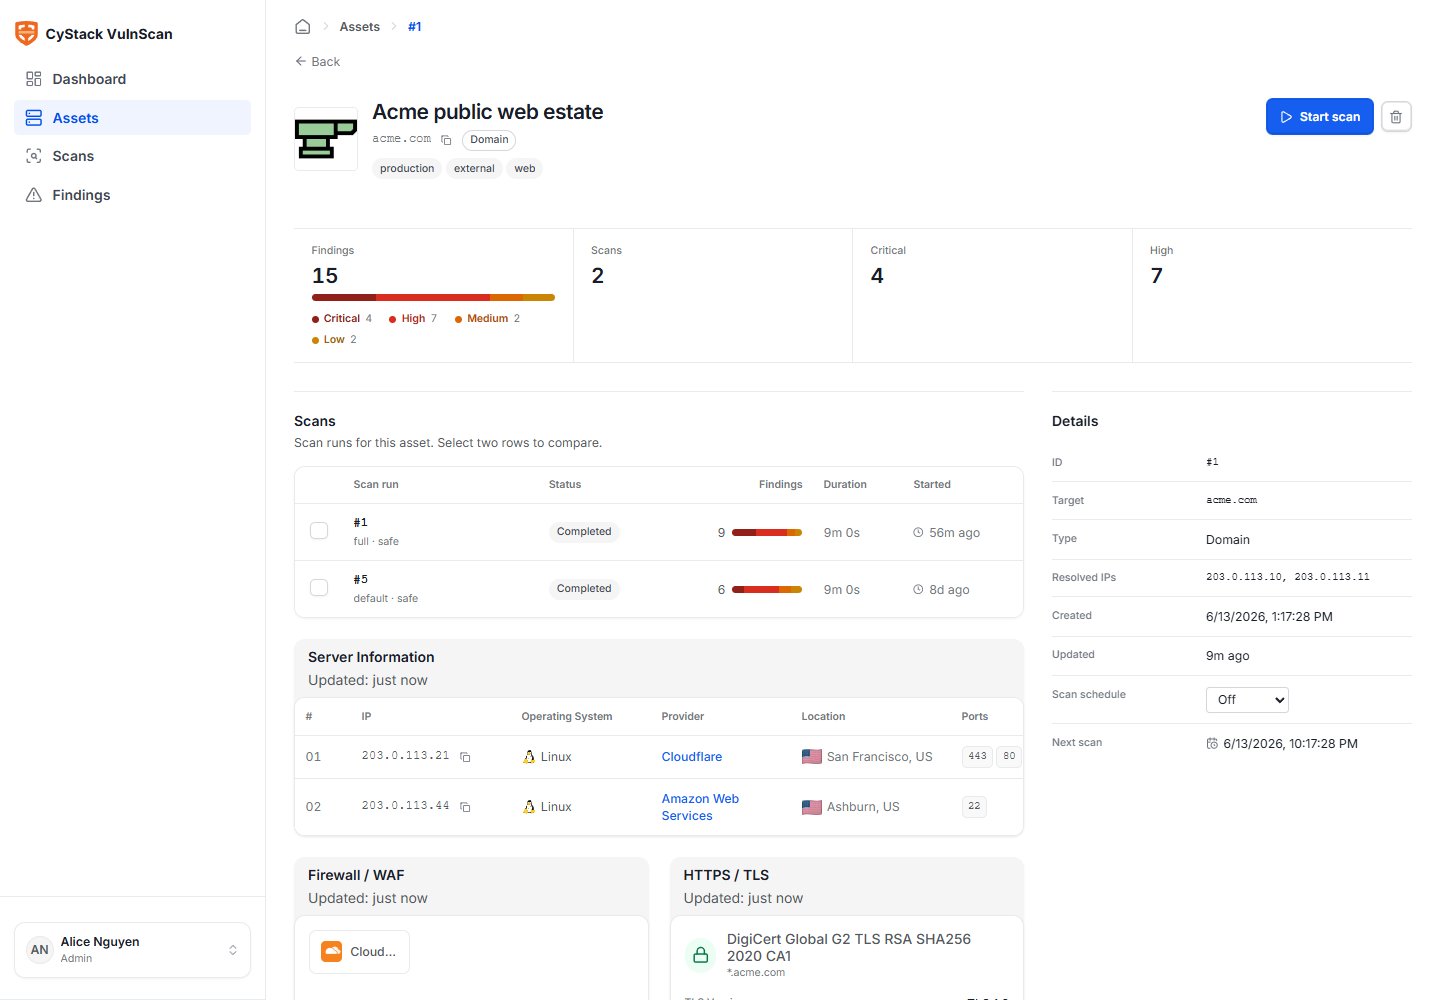
Step 8: Start a Vulnerability Scan
From the asset detail page, choose Start scan. Review the scan name, target list, and options before submitting.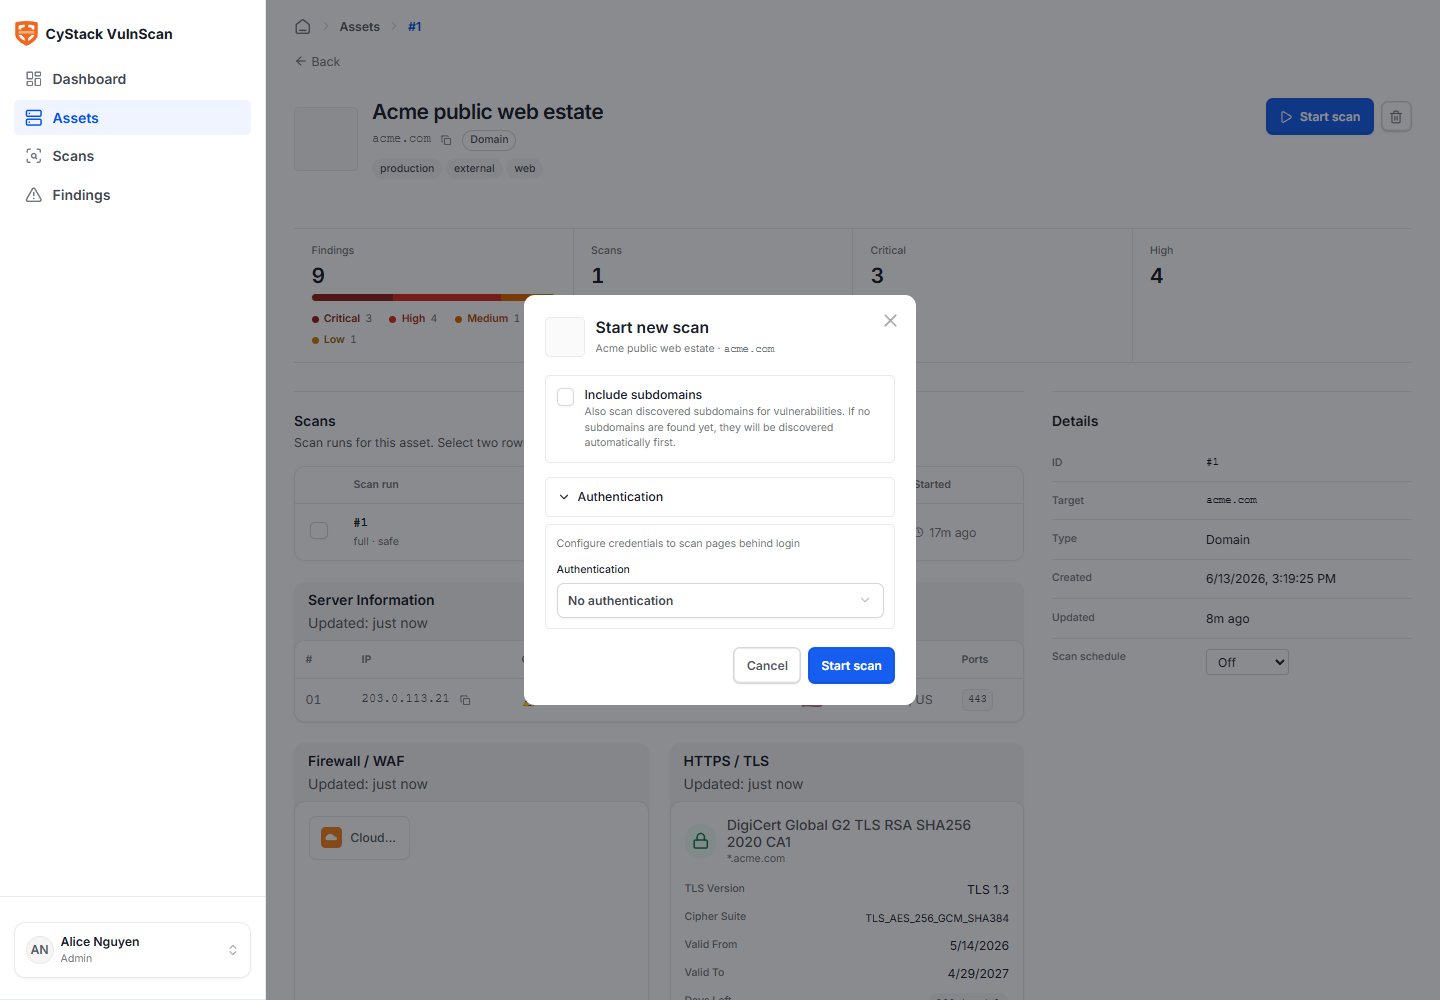
- Cookie string for logged-in web sessions.
- Custom headers for API keys, bearer tokens, tenant routing, or staging access.
- HTTP Basic Auth credentials where the application uses Basic Auth.
Step 9: Monitor Scan Progress
Open the scan detail page while the scan is running. The scan view shows the target, source, current status, discovered services, findings, severity distribution, and scan metadata.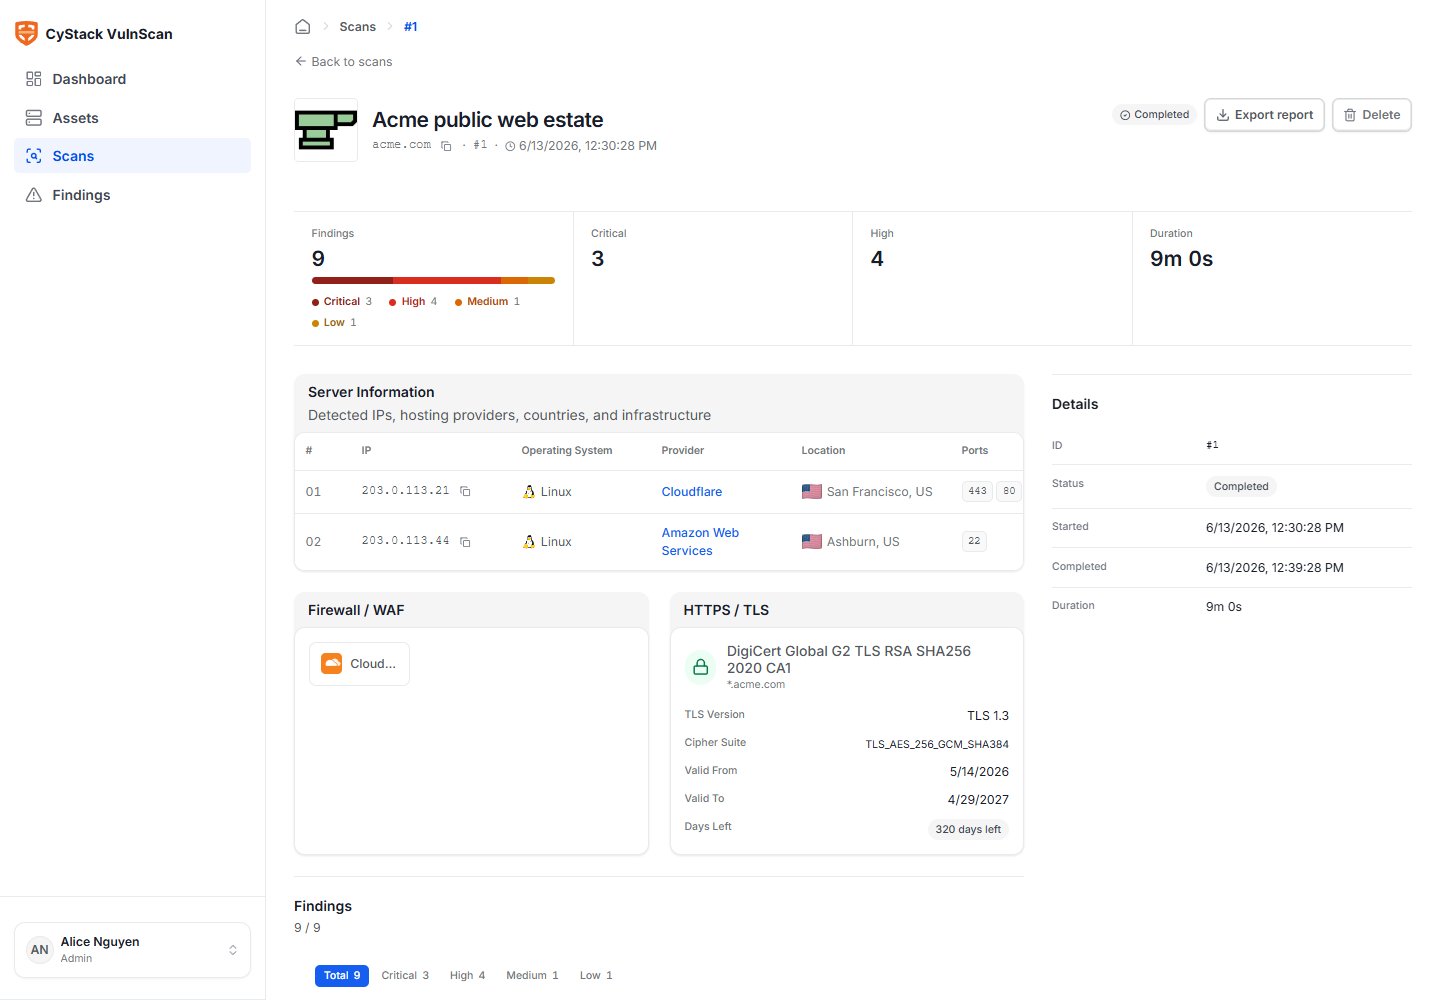
Step 10: Triage Findings
Start with Critical and High findings, then review Medium and Low findings based on business exposure. Open a finding to review evidence, affected endpoint, severity, risk score, confidence, CWE, OWASP mapping, references, and remediation.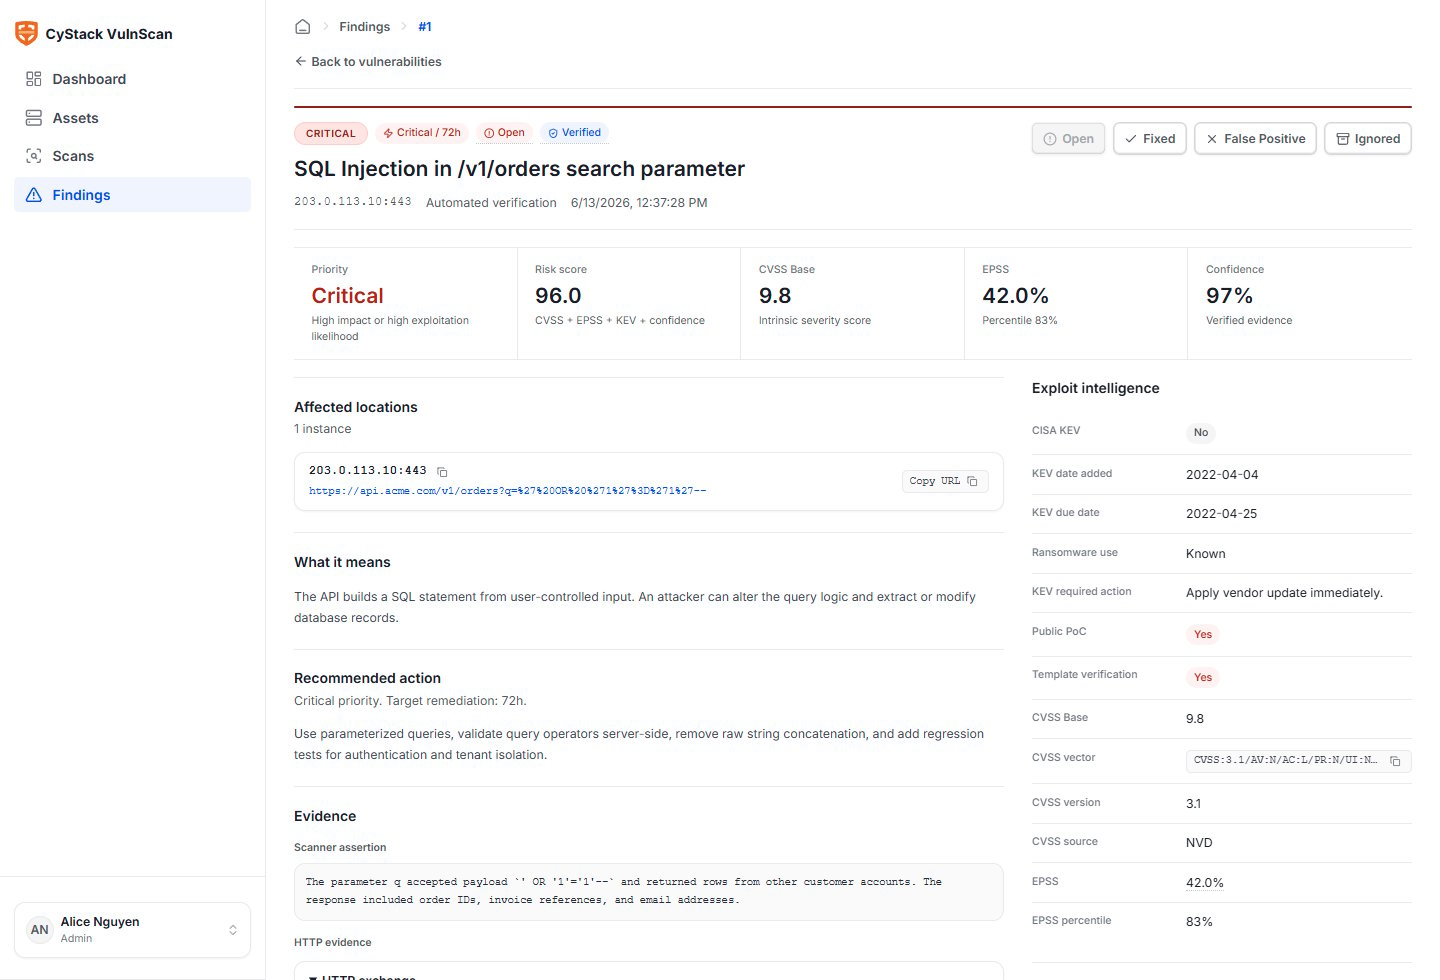
- What system and URL, port, or component is affected?
- What evidence did VulnScan collect?
- Is there a known CVE, CVSS score, EPSS probability, or CISA KEV signal?
- Which OWASP Top 10 and OWASP WSTG category does the weakness map to?
- What concrete remediation should the owner perform?
- Should the finding remain open, be marked fixed, accepted as risk, or classified as a false positive after review?
Step 11: Export a Report
Open Reports or use the scan detail export action. VulnScan supports CSV, JSON, and PDF exports.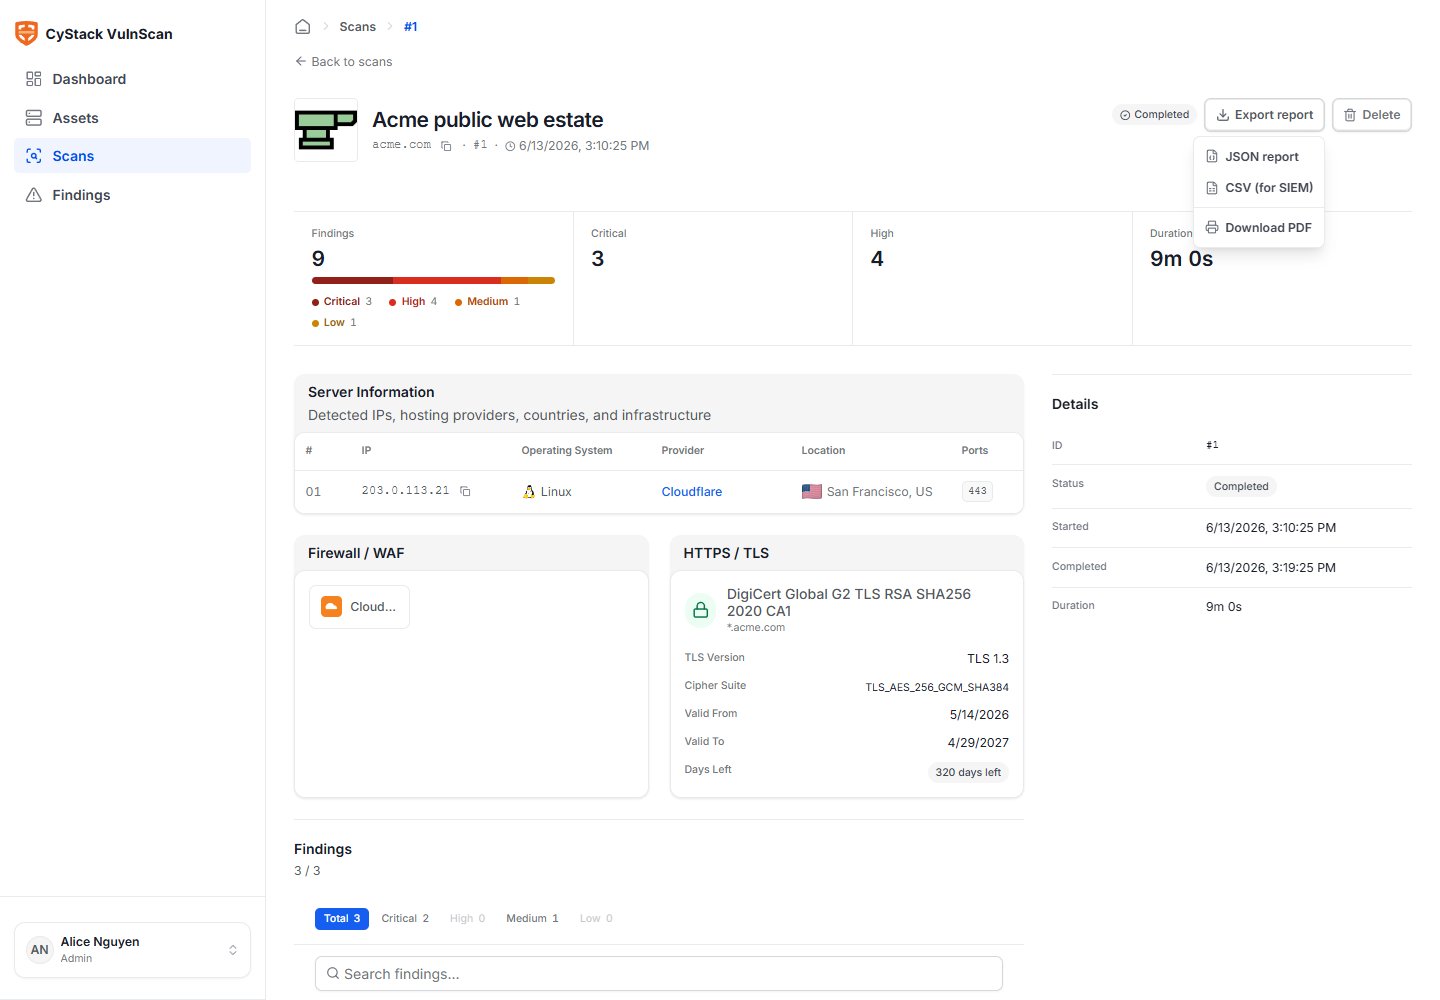
Step 12: Configure Workspace Operations
Before running the scanner for a broader team, complete the workspace setup:- Add workspace members and assign either Admin or Member roles.
- Configure SendGrid, AWS SES, or custom SMTP for email delivery.
- Confirm license target scope, target limit, activation limit, and expiration.
- Define an internal process for reviewing scan results and confirming fixes.
- Schedule recurring scans for critical external assets where continuous visibility is required.
First Production Checklist
Use this checklist before the first production scan:- License activated and target scope verified.
- Workspace administrator account created with a real display name.
- Mail provider tested successfully.
- At least one asset added and discovery reviewed.
- Authenticated scan credentials prepared where needed.
- Report recipients and remediation owners agreed.
- CSV/JSON/PDF export tested on a small scan.
- CLI automation configured only after the Web UI workflow is validated.