> ## Documentation Index
> Fetch the complete documentation index at: https://docs.cystack.net/llms.txt
> Use this file to discover all available pages before exploring further.
# Data Backup
> Guide to configuring backup storage and backing up data
**Use Cases**
* In the event of a hard drive failure or device theft, you can retrieve the latest data snapshot to minimize downtime and get employees back online quickly.
* If data is encrypted by ransomware or files are maliciously deleted, clean data can be restored from previous backups, mitigating business impact.
* When provisioning new devices or during employee transitions, critical data can be seamlessly transferred to the new hardware.
To back up business data, users must first configure a storage repository. Currently supported repositories include AWS S3, with Google Drive support coming soon.
Follow the instructions below to configure your storage repository and initiate data backup.
***
## Backup via AWS S3 Storage
### AWS Configuration for CyStack Endpoint
* **Prerequisites:** Ensure you have an account with appropriate permissions for IAM and S3 services. Generate a security key and run the following command to configure AWS CLI credentials, enabling the CLI to interact with AWS services:
```bash theme={null}
aws configure
```
* Replace the placeholders `[USER_NAME]`, `[REGION]`, `[ACCOUNT_ID]`, `[BUCKET_NAME]`, `[ROLE_NAME]`, and `[POLICY_NAME]` with your actual values.
#### 1. User
```bash theme={null}
aws iam create-user --user-name [USER_NAME]
```
```bash theme={null}
aws iam create-access-key --user-name [USER_NAME]
```
Save the AccessKeyId and SecretAccessKey from the output:}>
```json theme={null}
{
"AccessKey": {
"AccessKeyId": "AKIA...",
"SecretAccessKey": "wJalrX...",
...
}
}
```
```bash theme={null}
aws iam get-user --user-name [USER_NAME]
```
```json theme={null}
{
"User": {
"Path": "/",
"UserName": "[USER_NAME]",
"UserId": "AIA...",
"Arn": "arn:aws:iam::[ACCOUNT_ID]:user/[USER_NAME]",
"CreateDate": "2025-04-22T04:30:31Z"
}
}
```
#### 2. Bucket
```bash theme={null}
aws s3 mb s3://[BUCKET_NAME]
```
```bash theme={null}
aws s3api put-bucket-versioning --bucket [BUCKET_NAME] --versioning-configuration Status=Enabled
```
Create a file named bucket-policy.json with the following content:}>
The AWS value is the user ARN value in the previous section.
```json theme={null}
{
"Version": "2012-10-17",
"Id": "Policy1745394942216",
"Statement": [
{
"Sid": "Stmt1745394940328",
"Effect": "Allow",
"Principal": {
"AWS": "arn:aws:iam::[ACCOUNT_ID]:user/[USER_NAME]"
},
"Action": [
"s3:ListBucket",
"s3:ListBucketVersions"
],
"Resource": "arn:aws:s3:::[USER_NAME]"
}
]
}
```
```bash theme={null}
aws s3api put-bucket-policy --bucket [BUCKET_NAME] --policy file://bucket-policy.json --region [REGION]
```
#### 3. Create Necessary Roles
Create a trust-policy.json file to allow the new user to assume a role:}>
```json theme={null}
{
"Version": "2012-10-17",
"Statement": [
{
"Effect": "Allow",
"Principal": {
"AWS": "arn:aws:iam::[ACCOUNT_ID]:user/[USER_NAME]"
},
"Action": "sts:AssumeRole"
}
]
}
```
Create a role to invoke AssumeRole. This role will possess a minimal IAM policy, combined with a session policy for granular access control:}>
```bash theme={null}
aws iam create-role ^
--role-name [ROLE_NAME] ^
--assume-role-policy-document file://trust-policy.json
```
```bash theme={null}
aws iam create-role \
--role-name [ROLE_NAME] \
--assume-role-policy-document file://trust-policy.json
```
Create a generic-backup-policy.json file containing the following IAM policy:}>
```json theme={null}
{
"Version": "2012-10-17",
"Statement": [
{
"Effect": "Allow",
"Action": [
"s3:GetObject",
"s3:GetObjectAttributes",
"s3:GetObjectVersion",
"s3:PutObject",
"s3:ListBucket"
],
"Resource": [
"arn:aws:s3:::[BUCKET_NAME]",
"arn:aws:s3:::[BUCKET_NAME]/*"
]
}
]
}
```
```bash theme={null}
aws iam create-policy ^
--policy-name [POLICY_NAME] ^
--policy-document file://generic-backup-policy.json
```
```bash theme={null}
aws iam attach-role-policy ^
--role-name [ROLE_NAME] ^
--policy-arn arn:aws:iam::[ACCOUNT_ID]:policy/[POLICY_NAME]
```
```bash theme={null}
aws iam create-policy \
--policy-name [POLICY_NAME] \
--policy-document file://generic-backup-policy.json
```
```bash theme={null}
aws iam attach-role-policy \
--role-name [ROLE_NAME] \
--policy-arn arn:aws:iam::[ACCOUNT_ID]:policy/[POLICY_NAME]
```
Create a central-server-policy.json file:}>
```json theme={null}
{
"Version": "2012-10-17",
"Statement": [
{
"Effect": "Allow",
"Action": "sts:AssumeRole",
"Resource": "arn:aws:iam::[ACCOUNT_ID]:role/[ROLE_NAME]"
}
]
}
```
Attach the policy allowing the new user to invoke AssumeRole on [ROLE_NAME]:}>
```bash theme={null}
aws iam put-user-policy ^
--user-name [USER_NAME] ^
--policy-name STSPolicy ^
--policy-document file://central-server-policy.json
```
```bash theme={null}
aws iam put-user-policy \
--user-name [USER_NAME] \
--policy-name STSPolicy \
--policy-document file://central-server-policy.json
```
#### 4. Configure Connection from CyStack Endpoint to Storage Repository
In the CyStack Endpoint management dashboard, navigate to Data protection {'\u2192'} Backup settings.} />
In the "Backup storage" list, select S3 storage:}>
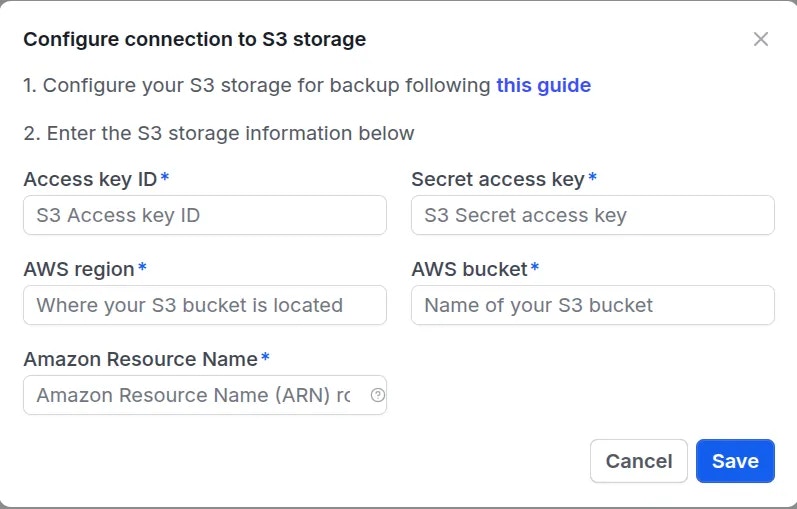
 In the pop-up window, enter the configuration details obtained in the previous steps and click
 Save:}>
 Once the connection is established, navigate to the Device tab. Select the checkbox for the target device(s) and click
 Enable backup:}>
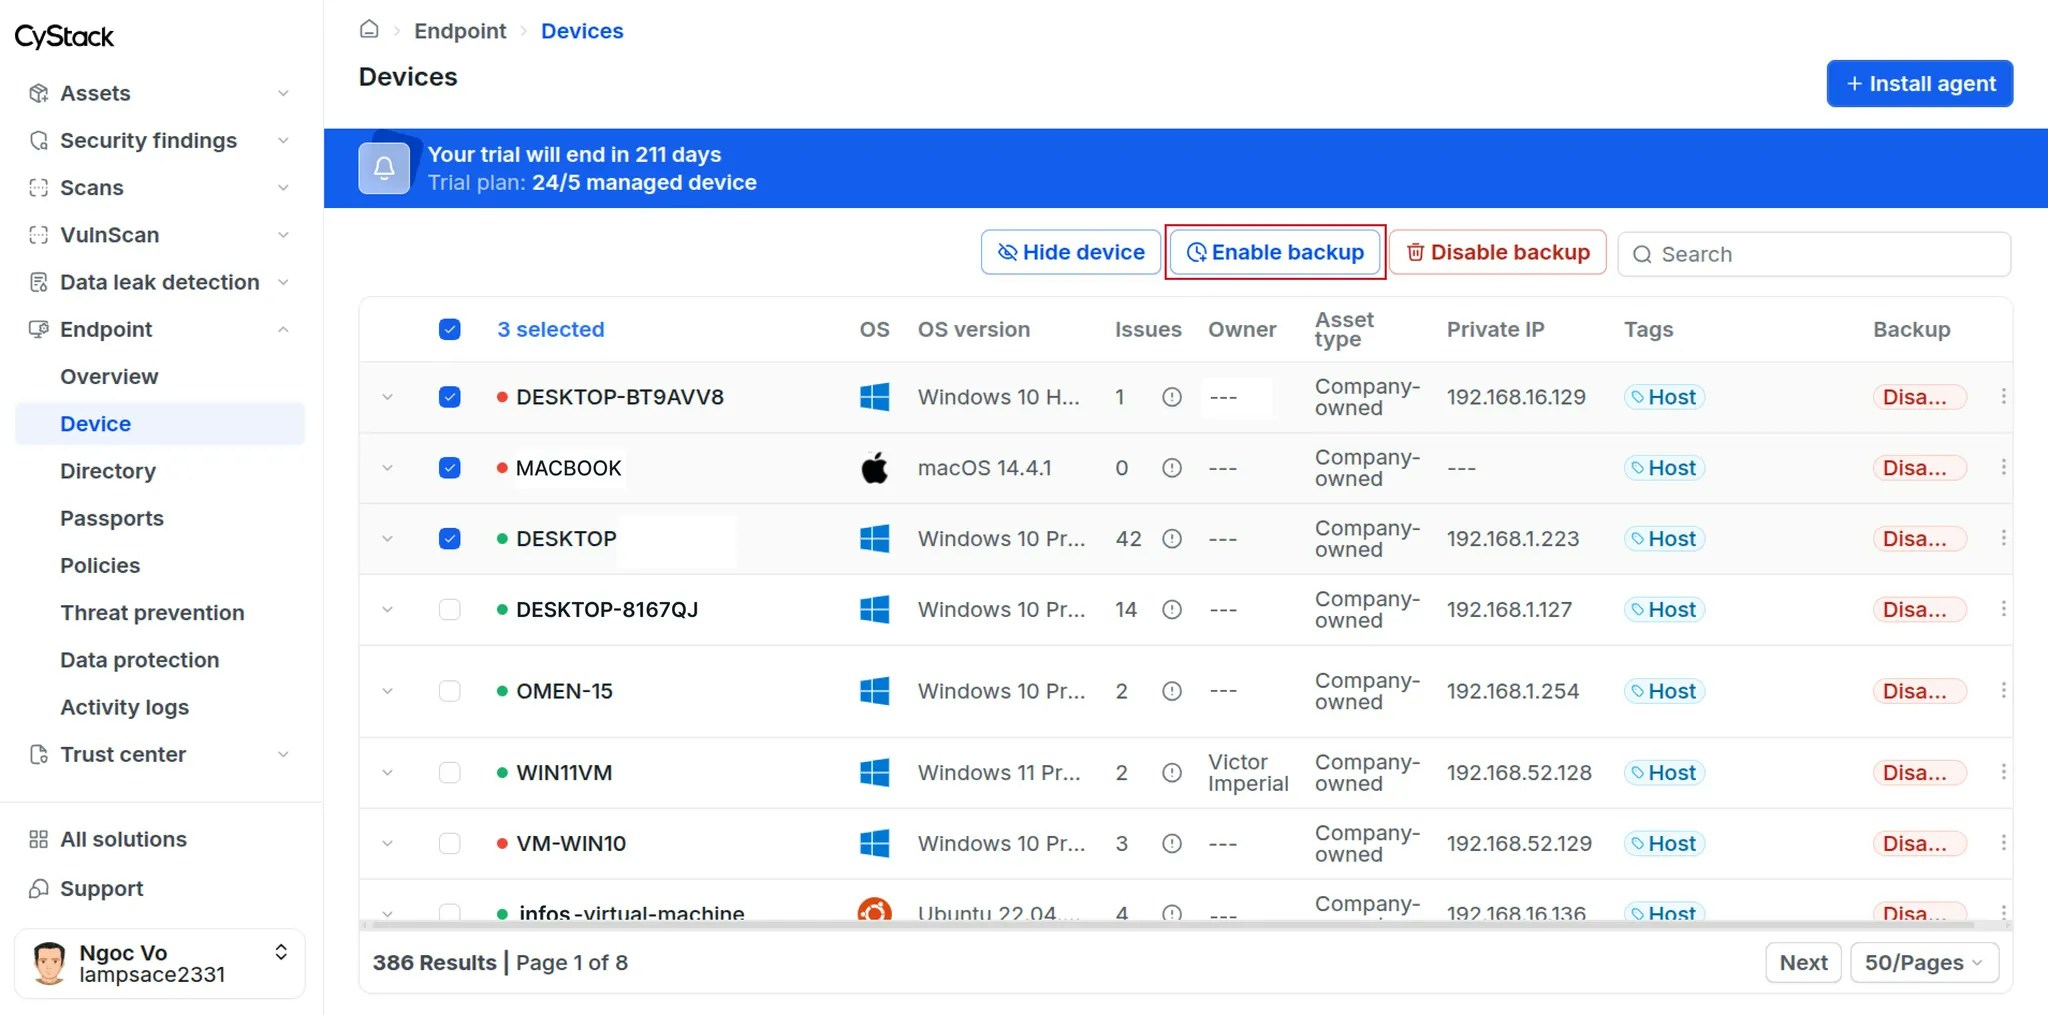 Data within the enterprise drives on selected devices will be automatically backed up every 6 hours. The backup process supports the following file types:
`.doc`, `.docx`, `.odt`, `.ott`, `.pages`, `.xls`, `.xlsx`, `.csv`, `.ods`, `.numbers`, `.pdf`, `.ppt`, `.pptx`, `.odp`, `.key`
***
## Data Recovery
In the event of device failure or data loss due to ransomware, business users can request the Workspace Owner or Administrator to restore their data. The Owner or Administrator should follow these steps to initiate recovery:
Click the
Data within the enterprise drives on selected devices will be automatically backed up every 6 hours. The backup process supports the following file types:
`.doc`, `.docx`, `.odt`, `.ott`, `.pages`, `.xls`, `.xlsx`, `.csv`, `.ods`, `.numbers`, `.pdf`, `.ppt`, `.pptx`, `.odp`, `.key`
***
## Data Recovery
In the event of device failure or data loss due to ransomware, business users can request the Workspace Owner or Administrator to restore their data. The Owner or Administrator should follow these steps to initiate recovery:
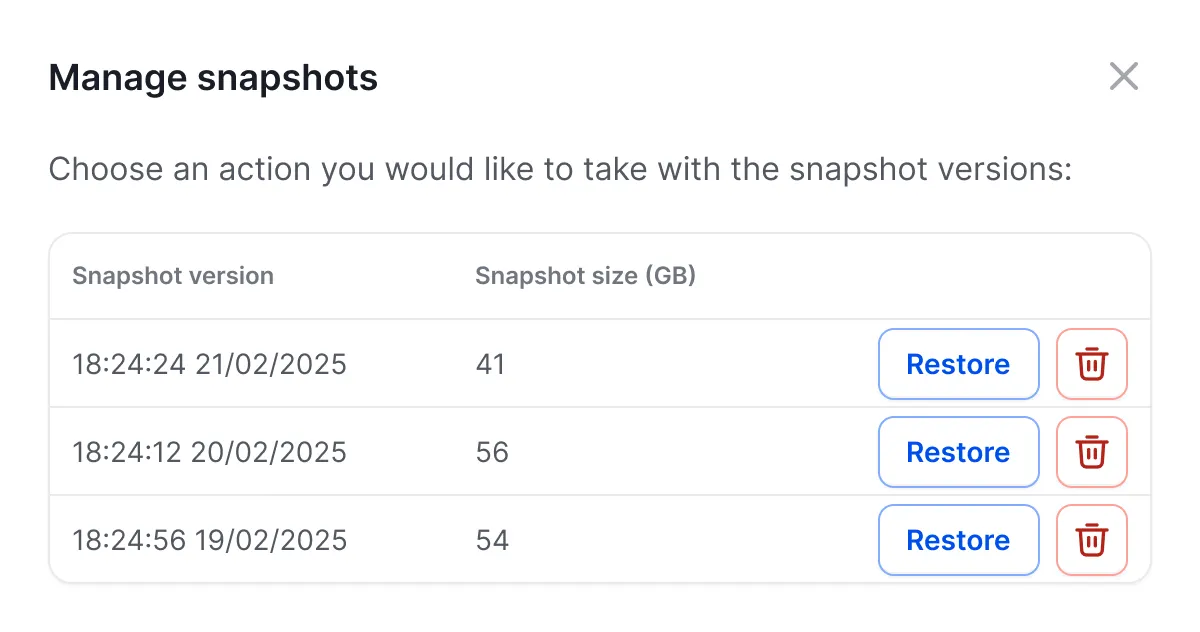
Click the {'\u22EE'} icon next to the target device and select Manage snapshots:}>
 In the "Manage snapshots" dialog, click the
 Restore button:}>
 The system will prompt the end-user on the device to confirm the restoration request.} />
On the client device, the user must click
The system will prompt the end-user on the device to confirm the restoration request.} />
On the client device, the user must click Confirm:}>
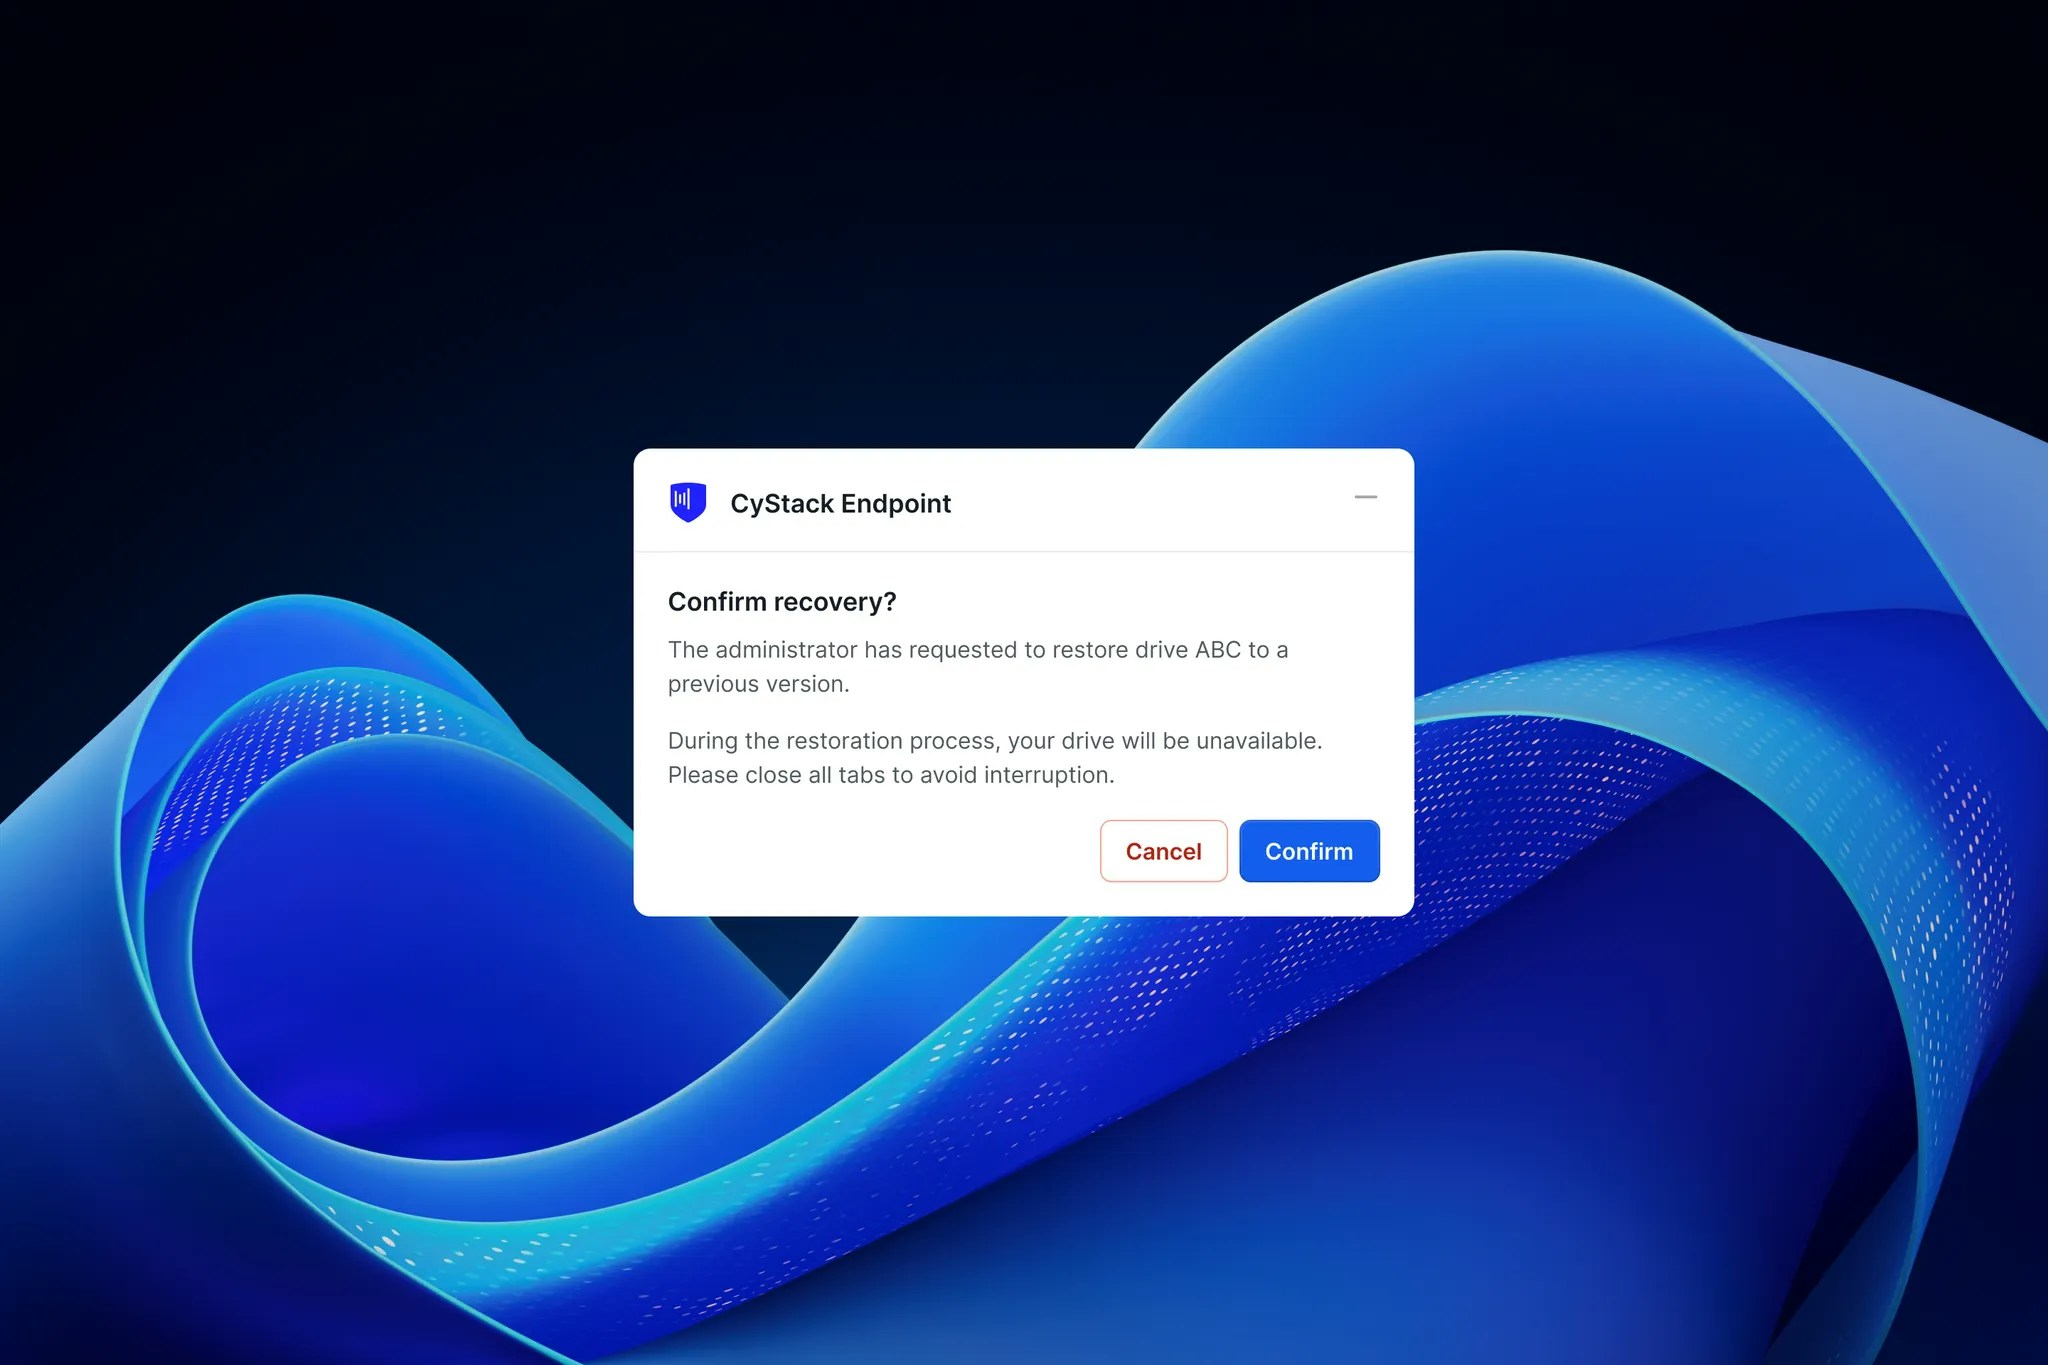 In certain scenarios (specifically on Windows), the user may be required to enter the BitLocker key (previously saved) to decrypt data after restoration:}>
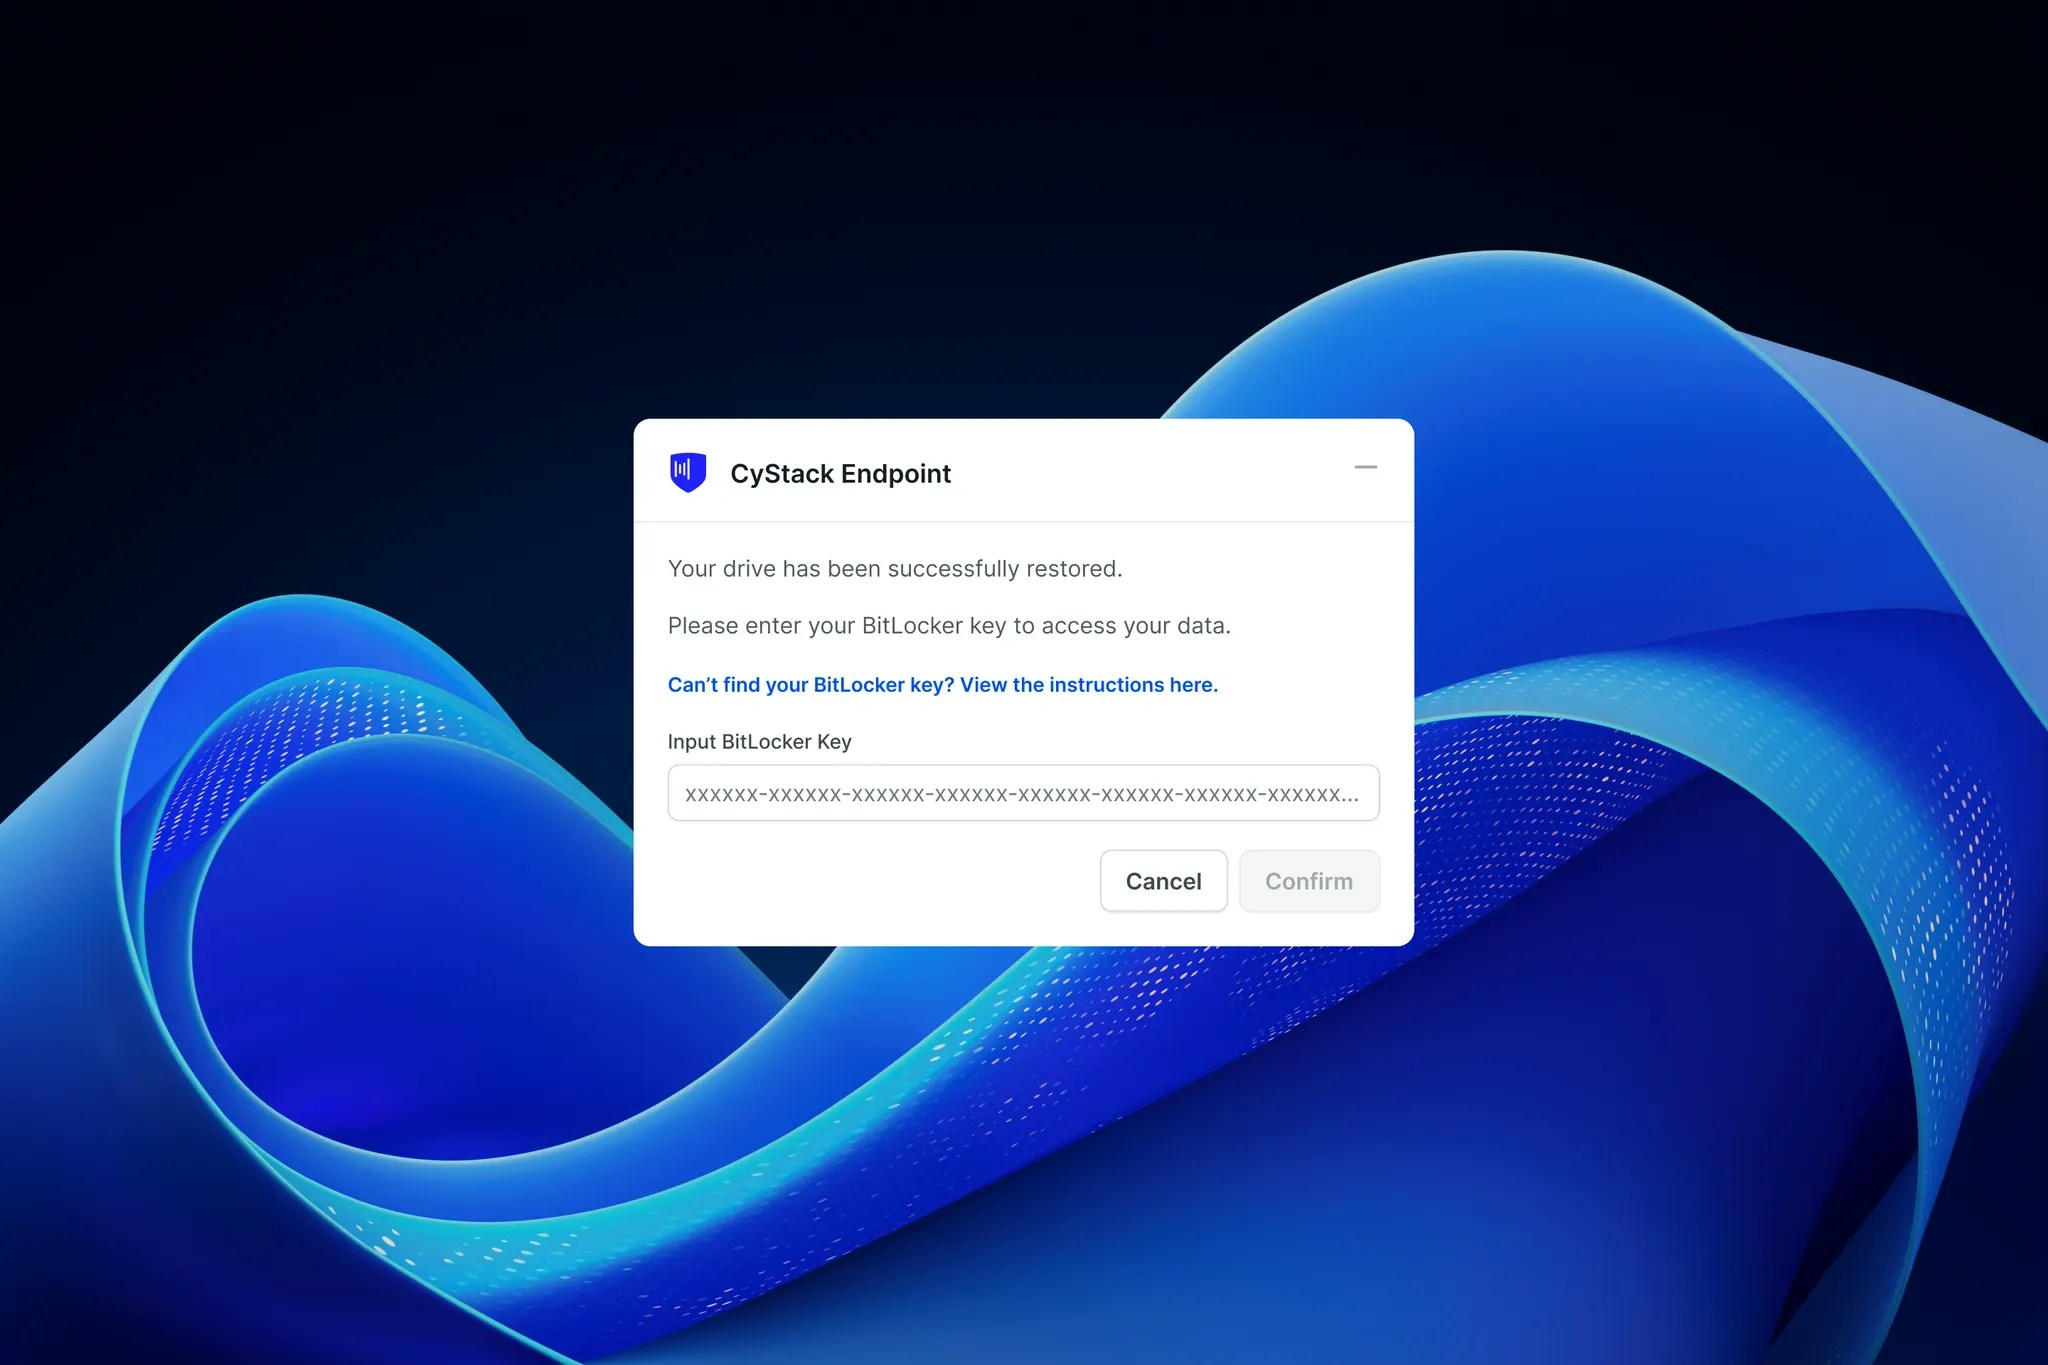 Upon successful restoration, the user will regain access to the data on the device drive.} />